Many beginners are willing to know what is the difference between raft and brim in 3D printing? Well, a raft and brim are two functions that are used for improving the success rate as well as the quality of three-dimensional models. Rafts are plastic layers placed on a print surface just before you print the object. A raft will help your object to stick to the surface. This is because it has a much more larger surface than the print’s underside.
However, a brim is a plastic layer that you have to apply to the print’s first layer. It allows great adhesion onto the surface. However, unlike a raft, a brim doesn’t extend outwards from underneath the print.
In this raft vs brim comparison article, we’ll see when to use a brim or a raft.
 Raft is a way to ensure the adhesion of a print to the bed. It is often used with ABS or TPU filaments to prevent corner peeling (warping). The adjustment of the parameters is essential to have a good rendering under the printed part because the underside can be really bad. So using the denser top layers of the raft really helps to get a clean finish.
As this grating has a larger area of contact with the base part itself, it promotes adhesion and leveling problems bypasses (when the gap is small). In some large 3D printers base such as cosplay printers, it is very difficult to obtain the exact level. It is therefore advisable to always use the raft. Unlike the brim, the raft mount is easy to remove with virtually no leftover.
A raft is usually for preventing warping. In cases where you could have just printed directly into the surfaces, parts, instead, are only built on top.
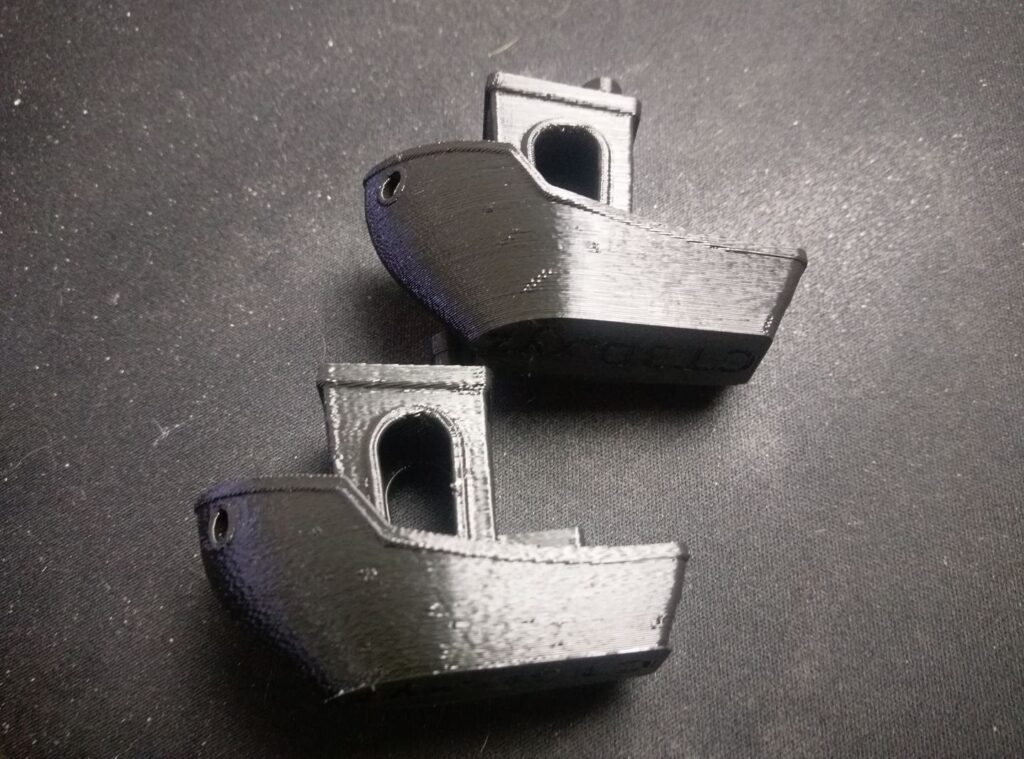
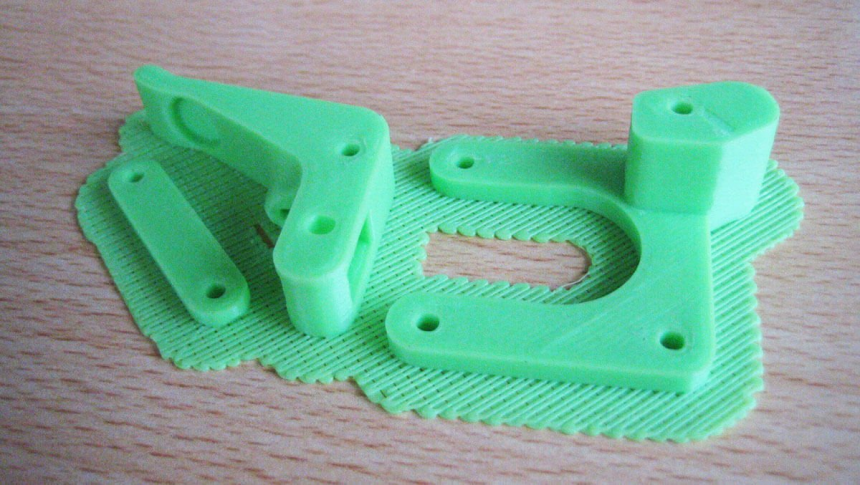
You have to remove and dispose of the raft when you’re done printing. The raft is bigger than the part and so has more grip. Rafts are mainly used with ABS to improve the adhesion of the bed. Rafts are also used in stabilizing models that have small footprints (for example, a pole). Rafts are used for creating a strong foundation on top of which you can build the top layers of models.
With the raft procedures, any user can make 3D prints of all kinds and with almost any material without any problem or complication, with no occurrence of warping.
The aim is to make the model adhere to the work surface in the best possible way. And not only that. Due to its geometry (generally consisting of one or more longitudinal layers at a certain distance, one or more transverse layers (always at a certain distance), and one or more planes printed with a denser pitch), it helps to discharge the forces of deformation along with these links. This, therefore, attenuates the warping phenomenon.
The raft is essentially “the last resort”, the extreme attempt to make the model adhere to the plan throughout the printing.
The Raft is generally deposited at much lower speeds than the subsequent layers (those that make up the model), with a higher flow rate and in some cases at a higher temperature. This improves its adherence to the plan.
The last levels of the raft (generally two) have a much denser pitch, which produces a surface almost similar to that of a real plane. “Almost” similar, since there is a small distance between one pass and the next. This improves the subsequent possibility of detaching the model.
The raft is practically essential if there are supports “from the ground”. The structure of the supports is by definition thin and fragile. They need a solid foundation to last as long as it takes without falling before the surfaces to support have been created.
The downside of the raft is obvious: it requires additional material, which will be discarded (actually, not much). Given the low speed with which it is laid, in the case of large prints (e.g. 25 x 25 cm, or 9.8 x 9.8 inches), it can take a few hours. It also requires additional postprocessing time, both for its removal and the finishing of the next base.
This is most suitable for materials that are difficult to stick to the basic method. This system creates a horizontal base between the 3D printer and the part.
If what you have is a flat object, then you don’t need a raft. However, a brim will help you separate the print work from the bed.
Rafts are usually used with ABS filaments
Trusted Source
Rafts, Skirts, and Brims Tutorial | Simplify3D
Learn how to 3D print with rafts, skirts and brims. This tutorial teaches you the pros and cons of each option and when to use them for your 3D printed models.
www.simplify3d.com
to help with warping and bed adhesion.
In the most fortunate cases, it is enough to tear it “like a film”. Keep in mind that most slicers allow you to define the distance of the model from the raft and the density of its support surface.
By manipulating these two parameters, it is possible to obtain a greater or lesser adhesion of the model and therefore aims at guaranteeing a greater seal or simplifying removal.
In cases where the adhesion to the model is high, you can equip yourself with a spatula. You should wear protective gloves to avoid possible injuries.
Once the raft is detached, the lower surface of the model is “whitened”, due to the micro-fractures that the material has undergone.
It’s better not to sand it; the situation would get worse. To bring the base back to its original color, you can use a hot air gun.
 The brim uses the same procedure as that of the skirt but in direct contact with the workpiece. This method is ideal for the small or narrow base, such as in a chair or on one of the tower pieces.
A brim is used with 3D printed parts that tend to peel off corners or contain narrow parts such as cogs and gears are also recommended.
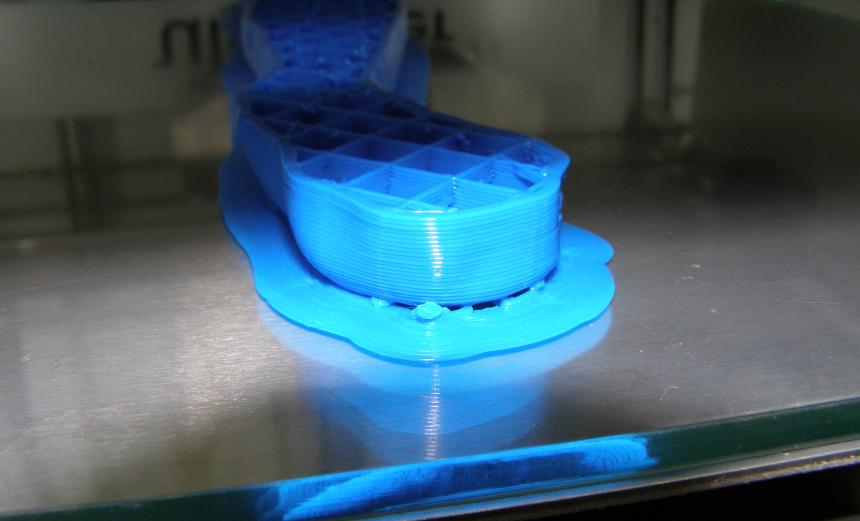
A brim is attached to a model and extends outward. Brims usually have multiple contours and can be a few layers high. Brims are often used to stabilize small parts of models. The Brims help the areas to connect to the print bed.
Brim combines the intention of improving the adhesion of the model to the base, and that of limiting the printing time to what is strictly necessary. We consider it an excellent compromise. It is suitable for non “extreme” situations (for which the Raft is more suitable), and when there are no ground supports, unless they fall within its “range of action”. It is defined as the number of additional lines with respect to the outer profile of the first section of the model.
One of the only downsides of this method is the difficulty of removing after 3D printing.
When using brim, it must be considered that in many slicers (and of course if the machine has only one extruder) it can only be made with the same construction material. This can make it more difficult to remove, as it is fully welded to the base.
If bed adhesion is a concern for you, it’s advisable to use a brim. Brims are attached to models and extend outward. Brims usually have multiple contours and can be a few layers high. You should use a brim if you need to avoid warping, especially with stronger materials such as ABS.
If you would however need a great alternative to the ABS filament, then the HATCHBOX PLA 3D Printer Filament is one of the most popular among 3D printers. Our experts recommend it for its dimensional accuracy.
If you still have to stick to ABS, then you should choose a model such as the Amazon Basics ABS 3D Printer Filament. It is guaranteed to reduce jamming and you have 5 filaments of assorted colors.
Similar to rafts, the brim also helps to improve bed grip.
You can remove this “brim” by tearing it by hand. But usually, you may not get a completely clean result.
There is a risk that in some areas the Brim will not detach completely, and in others, part of the base of the model will tear. The best way is to use a deburrer, easily available in well-stocked tool shops or online.
The deburrer must be used delicately on the edges on which the Brim is present, in both directions to obtain perfect and slightly rounded corners.
A brim simply widens the base of the object by surrounding the bottom layer closely with further material – this measure is used for tall objects with a small floor plan.
However, a raft usually consists of three grid layers that first form a building platform on the printing table, on which the object itself is then piled up. It is more complex but provides a lot more security than a brim. It is also useful for printers where the distance between the nozzle and table cannot be reliably adjusted at the start of printing.
However, with brim, fewer materials are used compared to a raft. A brim is also much easier to remove than a raft.
You should know that not all software offers both options, some have different or at least use different names.
A Raft allows the lower layers of the print to touch another layer of plastic, so there is less spreading compared to printing on the print bed itself.
Rafts render the geometry of the Raft well in 3D printing. It’s a basic structure generally made up of crossed lines, welded together.
Brim, also, in this case, reflects the shape of the horizontal extension of the section of the first layer, like the brim of a hat. However, contact points require sanding and parts may be broken when removing.
As we have seen in the raft vs brim comparison, Rafts are usually harder to remove than brims. This is because of the increased contact with the print.