PLA, or polylactide, is one of the most commonly used thermoplastics on the market today. It is made from lactic monomers that have been extracted from organic sources such as corn or sugarcane. It is a plastic that is versatile and biodegradable and can be used in a variety of products. In this article, we’re going to learn more about how to smooth PLA when creating products.
This bioplastic is the second most commonly used. The first one is thermoplastic starch across the world. The characteristics of PLA Trusted Source Polylactic acid - Wikipedia PLA has become a popular material due to it being economically produced from renewable resources. In 2010, PLA had the second highest consumption volume of any bioplastic of the world, although it is still not a commodity polymer. Its widespread application has been hindered by numerous physical and processing shortcomings. PLA is the most widely used plastic filament material in 3D printing. en.wikipedia.org are very similar to polypropylene, or PP, and polyethylene (PE). Since PLA can be produced in the same machinery created for traditional thermoplastics made from petroleum, it’s fairly inexpensive to make. As mentioned, we will explore why you need to smooth PLA, as well as how to do it. We will also explore some of the methods that should not be used in this process.
When we talk about smoothing PLA, we’re talking about administering a post-processing method to the printed parts to smooth out the manufacturing layers so they can’t be seen, as well as to get rid of any possible imperfections. There are a few advantages to smoothing PLA, such as:
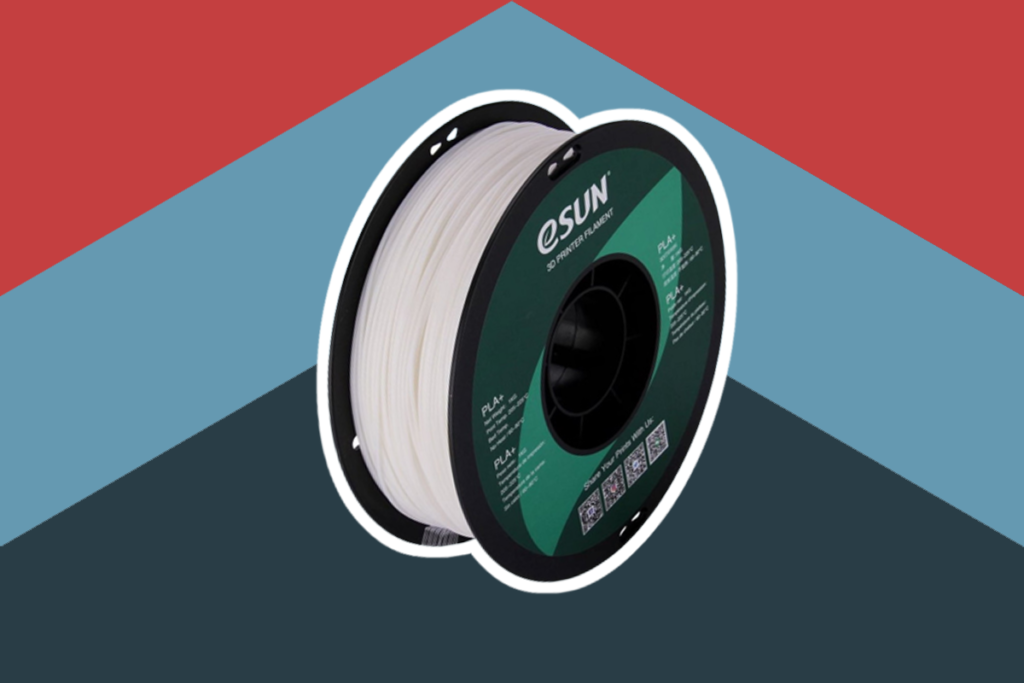
When purchasing your PLA for 3D printing, consider eSUN Silk 3D printer filament. This filament leaves you with a beautiful, silk-like finish. Now, let’s get into some of the ways that we can utilize for smoothing PLA.
After you’ve printed your piece with PLA, it’s time to get ready to smooth it. There are several methods you can use for this process. However, you must first prepare the piece by removing any excess material there happens to be on the piece.
Some pieces have excess material such as edges from supports/brim and need to be removed in order to properly finish the piece.
If using a utility knife, such as an X-acto knife, the first thing to think about is blade choice. A size 11 is usually a pretty good option since it’s so versatile- but there are others that may better suit your needs.
To remove excess material, the blade should be placed on the edge of the print and slid along the piece. Make sure that you don’t use too much pressure, or you may damage the piece and have to start over. Keep doing this until the edges are smooth.
If you don’t have a utility knife, a single-edge razor blade will work. Just be extra careful.
A rotary multitool, such as a Dremel, is another option for preparing your PLA print for smoothing. There are several attachments that may make this option more desirable. You use it in much the same way you would a utility knife, but the attachments make it easier to reach some of the areas that are hard to get to with the knife.
Keep in mind and these tools need speed, not torque, to be effective. So, if you do not see results, don’t increase pressure, but increase the speed. Also, you’re using the tool on plastic, so make sure that you don’t stay in one spot too long or use lots of pressure.
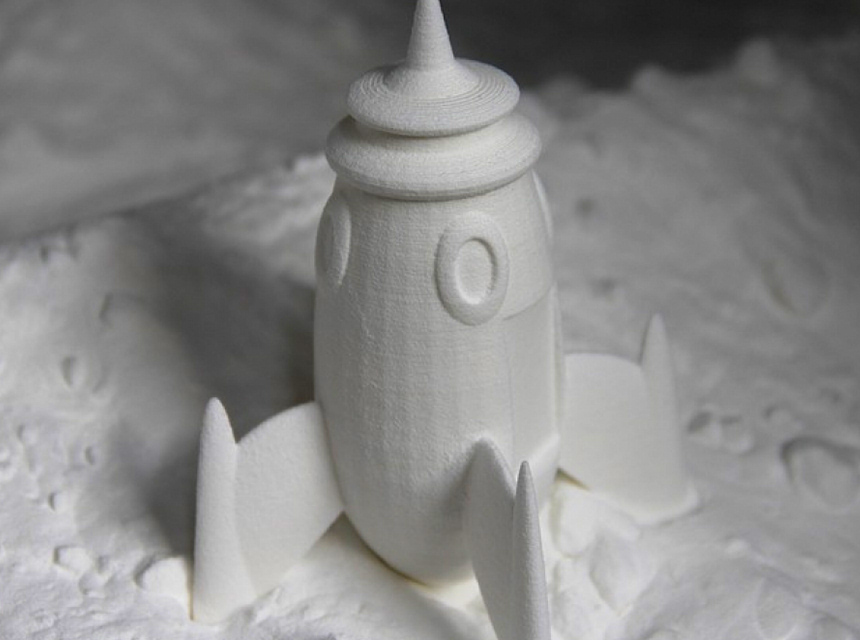
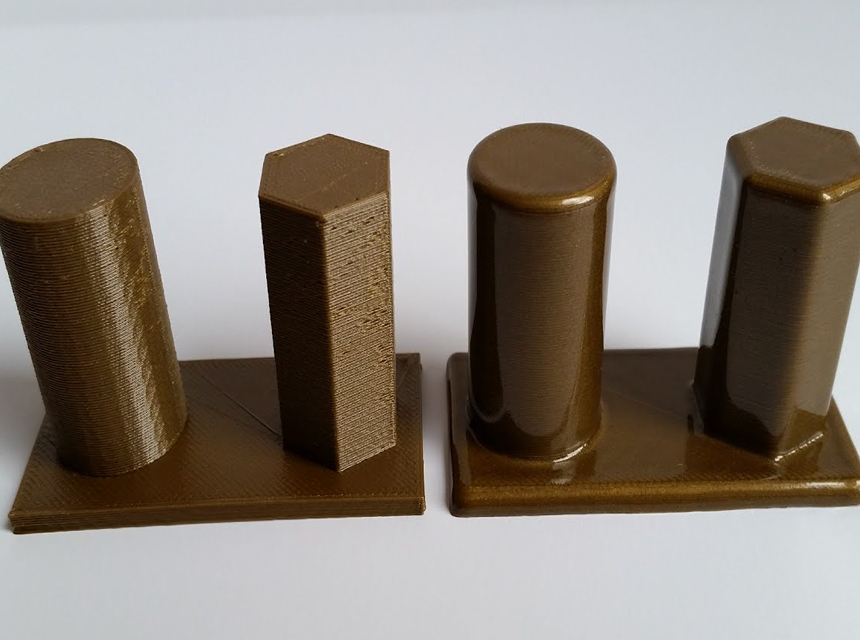
Regardless of the type of filament you’re using, when you use the Fused Deposition Modeling, or FDM, technology for your 3D printing, you’re going to have visible layer lines. Since this is an unavoidable part of the process, finishing is necessary.
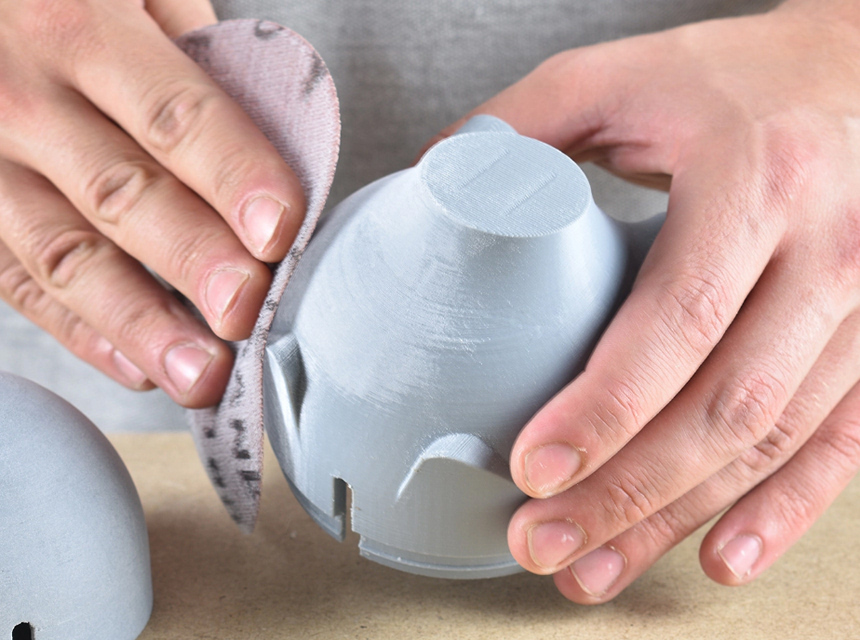
While it’s acceptable to use certain solvents with other filament materials, you’ll need to primarily use physical methods for smoothing PLA prints. The easiest method is sanding. Of course, if you want to make it even smoother, you can apply polishing or priming compounds- which we’ll talk about later. Either way, if you want flawlessly smooth PLA prints, you must take the time to perfect your sanding methods.
Keep in mind when you’re sanding your 3D piece, you need to sand in a circular motion, and you will want to avoid sanding too fast. Start sanding with coarse-grit sandpaper and keep sanding until the lines are no longer visible. This will cause the piece to look dull but don’t worry, and it will shine right up with the medium- and fine-grit sanding.
Once you’re happy with the results of the coarse-grit sandpaper, move on to the medium-grit and repeat the process. Keep sanding until you’re happy with the results, and finally move to the fine grit using the wet sanding method as outlined below.
When you were sanding with the coarse and medium-grit sandpaper, you were dry sanding and wiping away the dust from the plastic. Now, it’s time to use the wet method with a fine-grit sandpaper. Make sure that the sandpaper you have is appropriate for the wet sanding method because not all sandpapers are approved to be used this way.
Start by getting a small basin and filling it halfway with water. Then, submerge the print just enough to get it wet and start sanding. You’ll begin with 1000 grit sandpaper and then move on to 2000 grit.
As you sand, make sure that you continue to wet the surface of the print. This will help to remove the dust particles that are removed during the sanding process while also ensuring that the plastic remains cool and it doesn’t become deformed. This should make your last steps shorter and also upgrade the quality of the finished piece.
As we mentioned earlier, when you’re sanding, make sure that you take your time, and you go in circular motions. This also applies to larger pieces and larger areas of your piece. If you start to get in a hurry, you may end up deforming your piece.

If you are completely satisfied with your handiwork after sanding it, you can display it proudly without doing anything else to it. On the other hand, there are still some things you can do to improve the quality of the piece. You can make it nearly as shiny as a mirror. One of the most common techniques is polishing.
If you want to provide your PLA piece with a beautiful sheen, the best way to do it is to use a polishing agent. This will help to fill out any imperfections on the surface of the piece. The Polymaker Polysher is one of the easiest ways to do this.
However, if you wish to manually polish your PLA piece, you can use any metal polishing agent by applying it to the surface and buffing it with a soft cloth. After doing this, you should be able to see a significant difference in the surface quality of your piece.
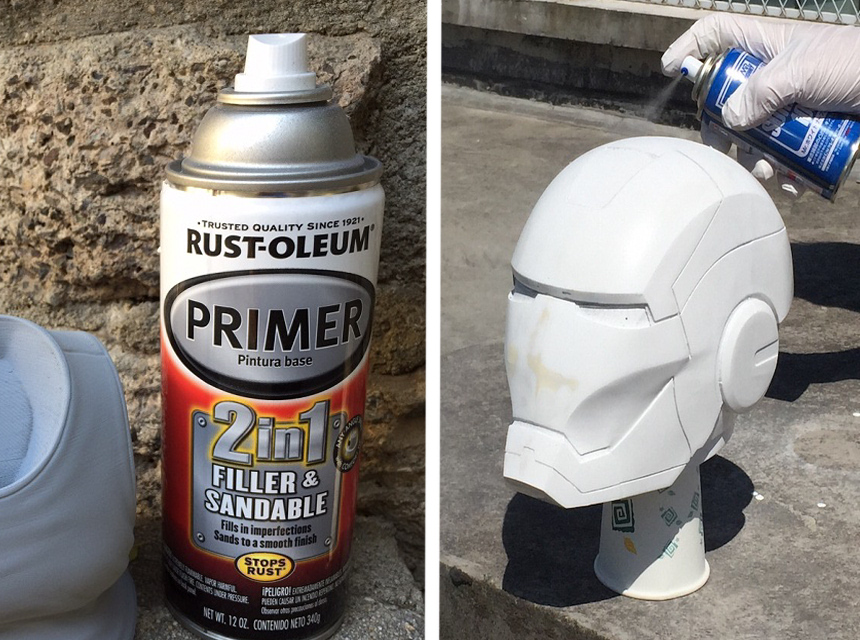
Primer is a type of paint that will strongly stick to the PLA piece and provide a uniform surface for the paint to stick to. There are different types of primers on the market, and each of them has different uses.
The best way to prime 3D pieces is with a spray-on primer because it provides a smooth, even coating quickly. You can also get a brush-on formula, which works well for fine touch-ups, but can be tricky to work with on larger areas.
When you’re getting ready to prime your 3D printed PLA piece, there are a number of things you must do to prepare it for priming. Those steps are outlined below:
Remove the supports by using a utility knife or rotary tool as outlined above. You can also use a set of cutters to remove them manually. Be very careful as you do this so that you don’t end up cutting off too much and ruining your beautifully printed piece.
The next thing you want to do is sand down the support marks. You can use the rotary tool for this step as well, or you can use sandpaper and manually sand it down. Start out with coarse-grit sandpaper, and as the piece begins to smooth out, move to medium grit, and then finally down to fine grit using the wet sanding method.
The degree to which you smooth the surface will have an effect on the finished product. The smoother you can get it, the better. Make sure that you’re removing any dust as much as possible as you go along this process. Once you have the piece perfectly smooth, it’s time to move to the next step: the application of the primer.
Now, you’re ready to apply the primer to your 3D-printed PLA piece. Start by drilling a starter hole in a discreet spot and mount the piece on a thin piece of dowel rod. Then, place the dowel rod into the paint block.
Carefully wash the surface of the piece to remove any dust that was left behind from the process of sanding it. You can use a small paintbrush to get into the hard-to-reach areas. Though you can use tap water if you want, it’s a good idea to use distilled or deionized water to avoid leaving behind water spots.
Put on a pair of nitrile gloves and, using long and gentle strokes, run a tack cloth over the surface of the piece. Make sure that you get into the small cracks of the model and always use long, gentle strokes in one continuous direction.
A tack cloth is a piece of material that is slightly sticky used to remove fine dust particles from the surface of a project before you put the finishing touches on it. Many people use them for wood projects, but they also are amazingly effective for 3D PLA prints as well.
Once you’re ready, it’s time to prepare the primer. Take the spray primer and swirl it in a circular motion for approximately 2 minutes. Don’t shake it, as it can cause the propellant to mix into the solvent, which results in bubbles when it’s sprayed. The goal of swirling is to get the pigment mixed into the solvent. After about 1 minute, you should be able to hear the mixing ball rolling around inside the can. This lets you know that the paint is mixed in.
From about 6 to 8” away from the piece, start spraying, using short, rapid strokes. This should be done quickly. While spraying, be sure to rotate the piece. Don’t pool the spray onto the piece but start with a thin base coat instead of a thick one.
Now that you’ve gotten the first coat of primer on, inspect to see if there are any areas that need your attention. If you need to, use fine-grit sandpaper to polish the piece. If you do need to do this, make sure to clean off the dust before you spray again.
At this point, you’ll spray on another coat of primer with short, rapid strokes. Be sure to do light coatings and stop as soon as you can’t see through it anymore. If you spray too much, you’ll cover up any details, which you don’t want to do. Once you’ve added your final coat of primer, it’s time to paint your printed PLA piece.
Sanding is something that should be done before you begin priming your piece. If you need to, you can sand after the first coat if you find any imperfections. However, make sure that you clean off any dust particles before you spray it with primer again.
Sometimes, you may notice some gaps or holes in your PLA 3D printed piece when you start inspecting it to get ready to prime and paint it. This is nothing to worry about. You can simply use a filler to fill in any gaps. Before you do this, though, you’ll want to make sure that you put on a pair of gloves so that you don’t get any on your skin. The process of using filler is actually quite simple. The steps are as follow:
As a general rule, you want the overall wall thickness of your 3D printed to be increased. The thickness of the top layer is the critical factor in whether you end up with large seams and gaps in your pieces. In addition to the thickness, the infill density will have a significant effect on whether the top of your piece is filled in or not.
Once you’ve gone through all the prep work, it’s time to varnish (paint) your PLA 3D printed piece. You’ll want to make sure that you choose thin paint that you can control. You don’t want to be using hardware store paint or fine art paint made for rough surfaces. These tend to create thick layers.
According to the experts, you should be using spray paints, as they are much easier to create thin layers and build the paint up. However, if you must, you can use paint that you can apply with a brush- just make sure that you dab it on instead of smearing big clumps.
The methods of finishing PLA prints as outlined above (sanding, polishing, priming, varnishing) are all quite time-consuming and require effort. If you have a lot of pieces that need to be done, it can become tedious. If you’re looking for a way to finish your pieces that is quicker, epoxy resin is an option. However, be aware that it’s also much more expensive than the other way.
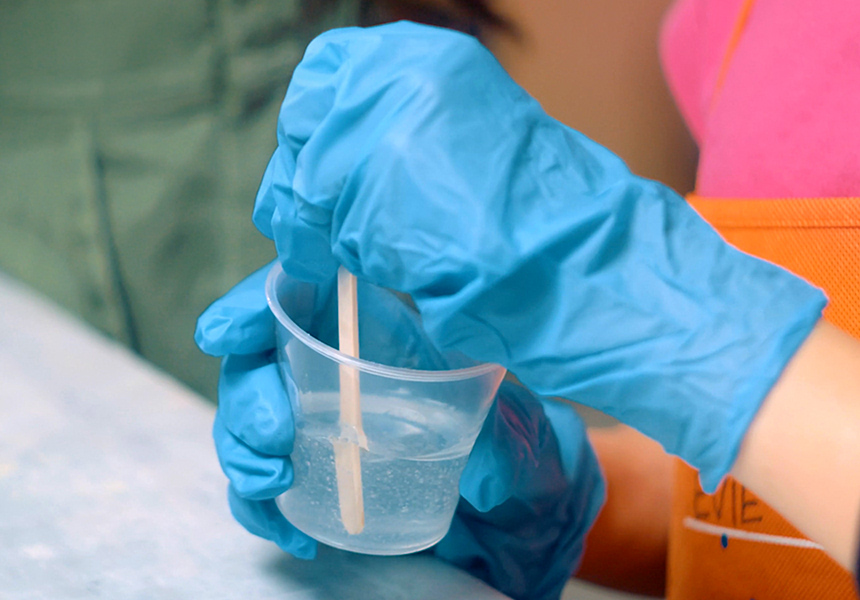
When you mix epoxy resin, you must make sure that you are using gloves so that you don’t get it on your skin. Make sure that your mixing tool is straight upright so that the material on the sides and bottom of the container get mixed in as well.
In addition to wearing gloves when mixing epoxy resin, you’ll want to make sure that you’re wearing gloves when you apply it as well. It will go on smoother if you use your fingers to apply it to your piece.
When it comes to finishing your 3D printed PLA piece, epoxy resin is not your only option. You can also use a brush on resin or even spray-on resin. You’ll want to do your research and learn which one will provide you with the results that you wish to achieve.
When you are using epoxy resin for finishing your 3D printed piece, there are several tips that you should keep in mind. First of all, you must make sure that you use the proper mixing ratio, which varies from one manufacturer to the next. Always read the label when you purchase an epoxy resin to make sure that you’re mixing it correctly.
Resin is quite sensitive to temperature. Ideally, the ambient temperature where the resin is being used should be around 68°F/20°C. Anything below that, and the cure time for the resin will slow way down. If it drops drastically lower, the resin could end up crystallizing. Anything above that temperature and the reaction time increases. Either extreme is not good.
In addition to being affected by temperature, epoxy resin is also affected by humidity. If the humidity is higher than 65%, you should make sure to keep the bottle of hardener closed. If you don’t use it right away, the quality will be impacted.
Always make sure that you are carefully mixing the epoxy resin components with the proper tools so that you can ensure a quality product. Also, make sure that you are using only high-quality resins and compatible components and colorants.
If you wish to add some color to your epoxy resin, make sure that you choose a compatible colorant so that it will mix in and react properly. The last thing you want is a piece that ends up getting color all over everything after it dries.
Never add water to your epoxy resin, as it could have a negative impact on your pieces. Make sure that the tools and containers you are using are clean and completely dry. Even just a few drops of water can impact the pieces.
Finally, make sure that you are using a large enough container to prepare the amount of epoxy resin that you would like to use. Be careful that you don’t mix too much, or you’ll end up having waste, and don’t mix too little, or it won’t properly coat your 3D printed piece.
When it comes to finishing your PLA 3D printed piece, there are many chemicals that are not effective and even may be harmful. However, there are several that are perfectly acceptable for this purpose. We will take a look at each of those below.
This is one of the few solvents that work well with PLA. When you brush it directly on a 3D printed piece made with PLA, it effectively removes the layer lines. However, in order to get the best results, you may need to do this a few times.
Keep in mind, though, and this is a toxic chemical and powerful solvent. Make sure that you don’t get it on your skin or clothes, and always wear breathing protection, so you’re not breathing in the fumes directly.
This chemical is mainly used in vapor treating PLA pieces. Always keep in mind that fumes from chloroform are hazardous and can lead to a variety of cancers. Ideally, if you use this chemical, you should be using a fume hood. However, since that’s not always possible, working in a room with good ventilation is acceptable.
This chemical is much safer and easier to get your hands on than chloroform or THF. It’s another great option for vapor treating your PLA pieces. Most people have had good results with this chemical.
Keep in mind that inhaling this chemical can cause nausea or respiratory irritation. Therefore, you want to make sure that there’s good ventilation and/or breathing protection when working with it.
This particular chemical has been said to dissolve PLA. It is highly effective for dissolving PLA supports used in ABS prints. The pH in sodium hydroxide is highly caustic. As with the other chemicals listed above, this one is quite dangerous, as it can cause irritation to your skin, eyes, and respiratory system.
If you plan to use chemicals to dissolve PLA, there are some things that you need to make sure that you’re doing to ensure your safety. When you’re using chemicals, always assume that there are fumes in the room and wear eye and breathing protection. Additionally, wear gloves when working with the chemicals, though the risk of absorbing it through the skin is typically quite low.
The truth is, it only becomes an issue when exposed to chemical fumes on a regular basis at high levels for long periods of time. In order to avoid the accumulation of fumes, make sure that the room you’re in has adequate ventilation.
As mentioned previously, the amount of time you are exposed to the chemical fumes can have an impact on the effect it has on you. Therefore, keep exposure to a minimum. If you are giving your piece an acetone bath, make sure that there are no people in the room and that there’s plenty of ventilation.
Many of the chemicals used in PLA finishing are highly flammable, no matter what form they come in. Take the time to make sure there are no ignition sources in the room when working with them. Keep in mind that even an electrical device can spark and cause an issue. Therefore, make sure that you unplug anything that isn’t needed.
Toxic solvents in PLA finishing areas outlined above: THF, chloroform, ethyl acetate, and sodium hydroxide. All of these can cause respiratory issues and more if you’re not careful when you are using them.
There are several methods that should not be used when you are finishing PLA, as they can end up ruining your beautifully printed piece.
While it’s true that acetone is a natural solvent and is one of the most useful solvents in a variety of applications, this chemical is even used in 3D printing, primarily to dissolve or smooth ABS printed pieces. However, it’s not recommended for use on PLA prints for a few reasons. We will take a look at those below.
Hypothetically, you should be able to use acetone as a solvent for PLA. This is based on the fact that acetone is a natural solvent and PLA is a natural polymer. After all, in laboratory testing, the ability of acetone to dissolve PLA has been well documented. This is the “like dissolves like” rule.
There have been many people who have tried to dissolve PLA in acetone with no luck. They end up with a product that has a rubbery texture and splits along the layers. The acetone didn’t dissolve the piece completely, but it didn’t do much to smooth out the layer lines either.
PLA has a fairly low melting point, which makes it a really easy filament to work with- but it also means that using a heat gun to smooth out your pieces might not be the best idea.
Though some people do use heat guns, and it’s fine as long as you don’t stay in one spot for very long- it is also possible to put enough heat on it to go over the glass transition temperature and cause your piece to become deformed.
While some people do use sandblasting to finish out their PLA 3D prints, it is a very precarious process. You may end up causing your piece to become deformed through too much blasting. You don’t want to do that after all the hard work you put in to create your piece.
In recent years, 3D printing has increased in popularity. It seems like everyone has a 3D printer and is making things for themselves, their loved ones, and even things to sell. According to the experts, PLA is one of the best filaments for a newbie to the world of 3D printing. If you’re learning to create 3D prints with PLA, you need to also learn how to finish them properly. Post-processing methods are simple, as you can see- through some of them may be a bit tedious. You must learn post-processing, though, in order to advance to the next tier of expertise. It’s the best way to provide a professional look to your pieces, worthy of charging a premium.