No matter how skilled you are, at some point in your 3D print career, the print won’t come out as expected. 3D print over extrusion Trusted Source Gaining a better understanding of the extrusion process in fused filament fabrication 3D printing | SpringerLink Over the past few years, many researchers have attempted to better understand the melt extrusion process during 3D printing. link.springer.com is one of the unexpected results that can be gotten. The success of your prints is determined by you and your printer, so when things are not in order, the print will most likely come out in a shape that isn’t wanted.
Over extrusion produces a poor quality print with an imperfect shape. This undesired result will happen if you lose focus while monitoring the progress of the print solidification, use a printer with an inappropriate nozzle size, or use a printer with inappropriate settings.
However, this article seeks to give a detailed description of what over extrusion looks like in 3D print, the causes, and most importantly, the methods to remedy over extrusion, so stay tuned.
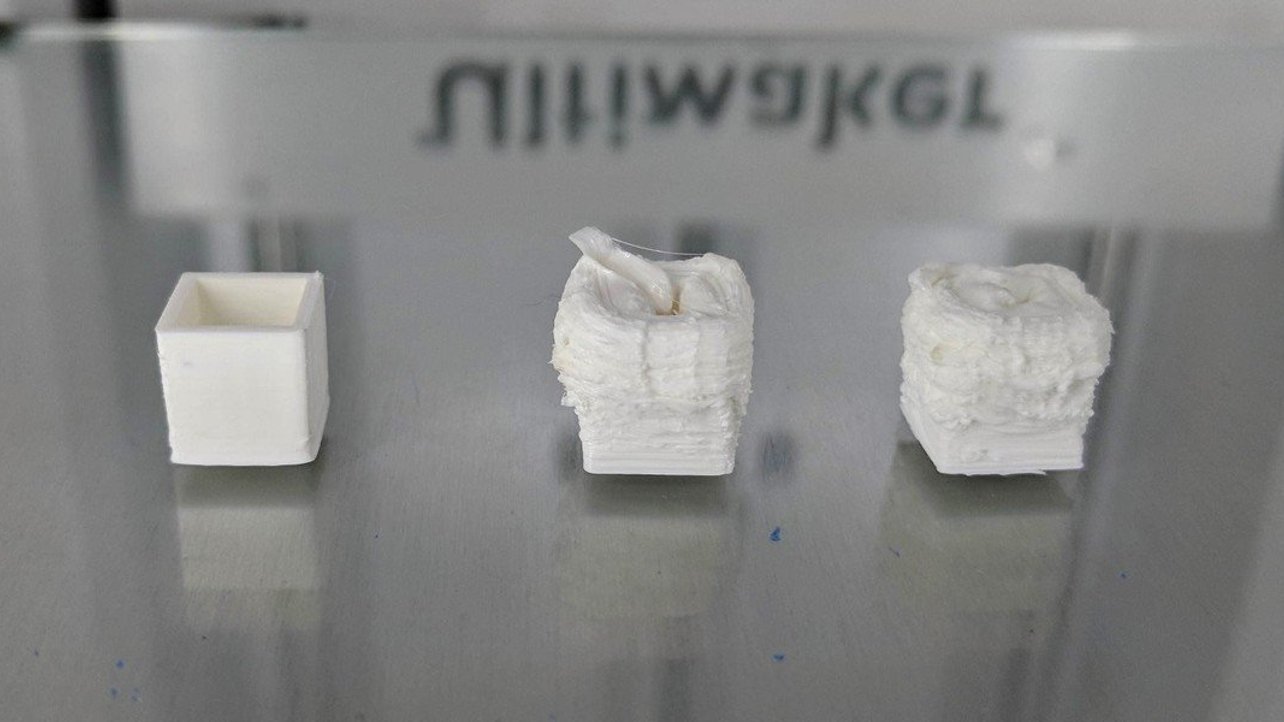
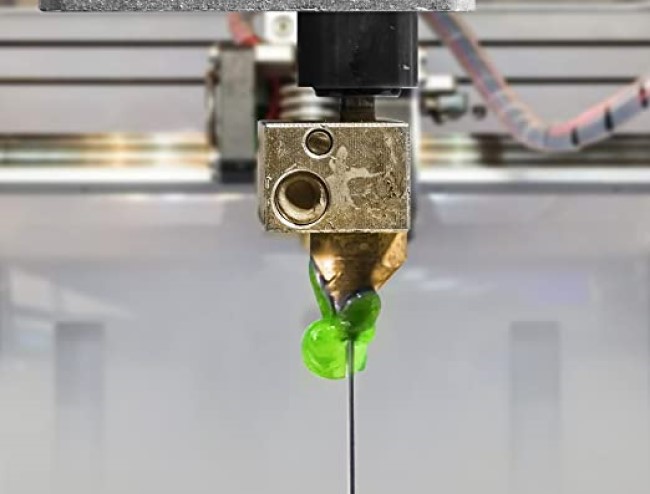
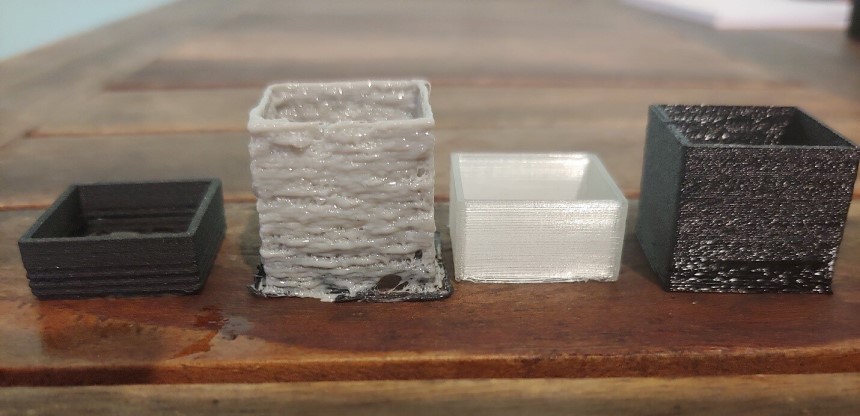
In 3D printing, over extrusion is a disaster that happens to anybody, even to the best of 3D enthusiasts. Over extrusion happens when the machine prints at an excessively high rate, resulting in oozing, stringing, and blobs. The shape and quality of the print are usually different from what you wanted; various sides could be scaly and of different textures and weights.
3D print over extrusion occurs quite often, especially when working with delicate and soft materials or when trying to attach two elements of a model together. This is why you would have to pay close attention to the process.
These are the major reasons why your 3D printer extrudes too much material:
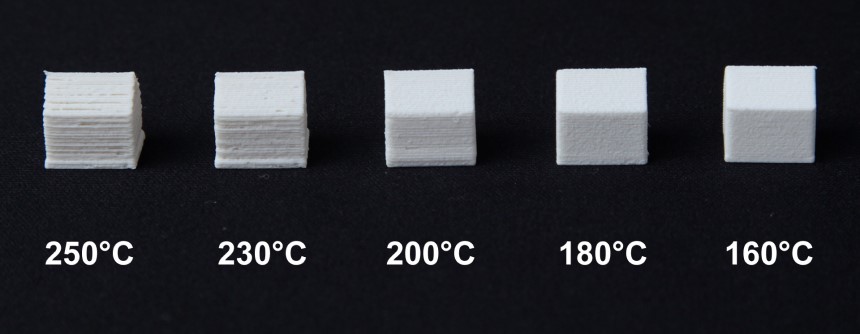
The amount of heat emitted by the printer determines how the material gets more liquid. So, a hot printer liquefies the material faster, and as a result, compromises the design quality of your print which ends up being sloppy. In most cases, this is the reason why there is over extrusion.
The printer blobs out more material as it heats up. Thus, printing at a reduced temperature allows you to manage the amount of print material used, resulting in more exact layers and curves.
Nevertheless, make sure you don’t reduce the temperature too much as it would result in under extrusion, causing your 3D layers to not bond.
 Filament Problem
If the filament diameter is incorrectly measured by your slicer, the printer will extrude the material faster, resulting in over extrusion.
Also, the nozzle could be pouring out too much filament because of your flow rate settings. An increased flow rate can wreak havoc on your print’s dimensional precision.
While a filament with a high flow rate can result in tight bonds between your print layers, excess of it can be harmful. Therefore, reduce the flow rate in order to get a perfectly shaped and high-quality print.

Despite the fact that nozzle size is sometimes disregarded, it impacts the result of your print. A misaligned nozzle could prevent you from getting the perfect 3D print that you desired.
Therefore, to get a better resolution in 3D printing, it is essential that you use a proper nozzle size. It will produce a beautifully carved 3D print.
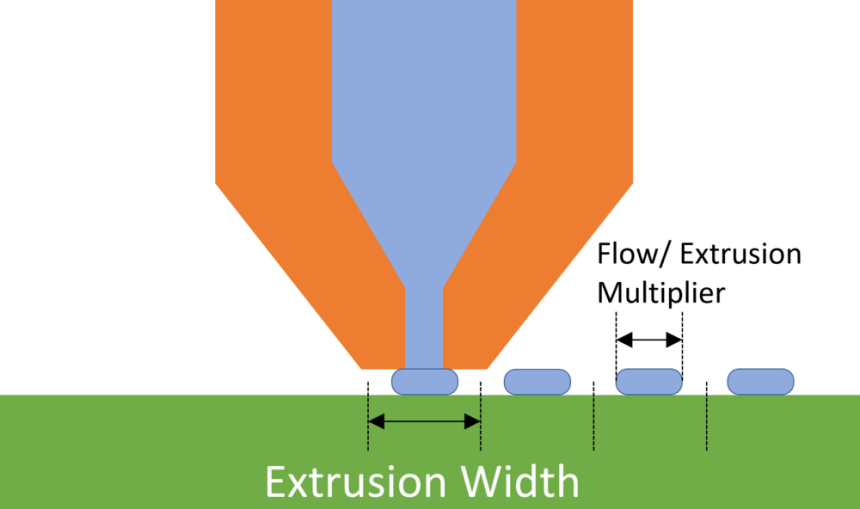
The printer extrusion width is affected by the nozzle size. When you combine that with a highly heated filament, you would end up with a serious case of over extrusion.
To fix 3D print over extrusion on overhangs, carry out the following remedies.
As previously said, a high printing temperature is the major cause of 3D print over extrusion, so to fix it, you have to reduce the temperature. With a reduced temperature, your material melts a little slower, helping you manage the amount of filament flowing through the nozzle.
As you reduce the temperature, make sure it’s done gradually; you can tune it down by 5 degrees Celsius until you see that there is a reduction in the extrusion level. It’s very important that you practice trial and error with each filament because they have different optimal temperatures.
After this, if over extrusion continues, it is unlikely that the print temperature is to blame.
 Once you notice that your printer is over extruding, stop the printing process. You may simply need to adjust a few settings, and you’re good to go.
The rate at which Ender 3 or any other printer over extrudes is dependent on the extrusion multiplier. To amend 3D print over extrusion on overhangs, you would have to reset the amount of 3D filament material that comes out of the printer nozzle; you would have to reset the speed as well.
Changing this setting is simple. Go to the printer menu and search for the ‘Tune Settings.’ The default value is between 90 and 100, but you can make changes to it to suit your preference. Also, getting a 3D printer that simultaneously prints multiple filaments can save you from over extrusion.
While making a reset to the extrusion multiplier, ensure you don’t make any significant modifications; you may end up having under extrusion if you drop this setting by a large amount.
Measure the width of the filament with a caliper in various locations and average the results. Although most filament producers will mention the appropriate dimensions, getting an actual figure is preferred. Small changes may appear inconsequential, yet they determine if you will have a perfect print or not.
There is no definite flow rate – it’s a trial and error process. For each filament, you’ll need to determine the appropriate flow rate and make the setting in your machine. This procedure entails selecting a model and attempting to print it using various flow rates until the best results are obtained.
The procedure should be carried out in stages, with the rate being reduced at 5 percent intervals. For example, you started the print process with a flow rate of 100 percent and noticed over extrusion, and you should reduce it by 5 percent, making 95 percent the new flow rate. Keep on reducing it in this manner until you find the appropriate print setting.
Another thing you can do is to get a TPU filament and change your printer stepper motor drive to attain your print expectation.
Many people overlook the nozzle’s effectiveness, but it shouldn’t be so because this is where the material will come out from. The nozzle is the most crucial aspect of the material’s design, and using the wrong nozzle size might cause over extrusion, which can ruin your 3D print pattern. The beauty of the 3D print nozzle is that it can be adjusted; all you need is a screwdriver. So, after comparing the size of your nozzle with the kind of printing you are set to do, you can easily make changes.
If your print is over extruding, all you need to do is to change your nozzle to a smaller size as nozzles determine the extrusion width. There won’t be over extrusion with an appropriate nozzle as the material will flow out as it ought to.
Over extrusion can also be caused by nozzle wear and tear or breakage. As a result, if the print isn’t coming out as you want, assess the nozzle’s condition. Keep an eye out for any cracks or peeling. You should also clean your nozzle at all times to avoid stringing Trusted Source What is Stringing | IGI Global Definition of Stringing: Unsightly strings of plastic between parts of the printed model. www.igi-global.com .
To have a successful and perfect print, get a printer that’s capable of producing top-quality designs, and according to reviews, users hail Anycubic Predator 3D Printer and CreatBot F160 3D Printer for their perfection.
 There are 3 distinct ways of testing for over extrusion. They are:
Method 1: Print a test model with zero percent (0%) infill and an average thickness of 1.2mm. This method verifies edge extrusion, so the print edges are perfectly rounded to prevent cornering. Note that you will have to wait for it to cool off before removing it from the build pale. This could take up to 7 minutes to complete.
Method 2: You can also test with clippers. Print one measure to the inside and another to the outside. If the outer part proves to be more prominent than the interior, the discrepancy could be due to over extrusion. However, if the inner half is larger, the discrepancy is most likely because of under extrusion.
Method 3: You can also test without using any tool. Just print two parts that should fit together flawlessly. If the two parts don’t make a bond, over extrusion has happened. However, if you see a gap between them, under extrusion has happened.
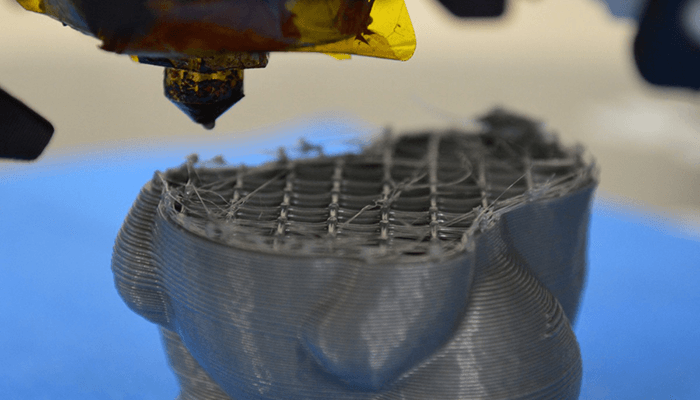
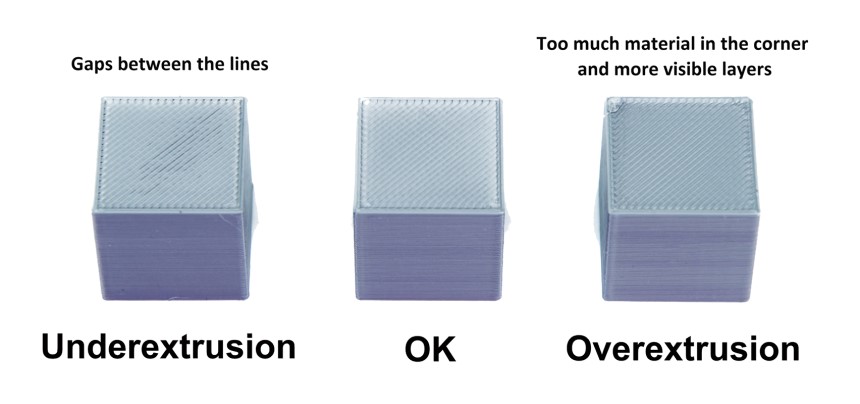
When your 3D printer over-extrudes, it causes several disadvantages, including poor quality prints, the wastage of materials, dimensional inaccuracy and blobs, jams, and layer dropping.
Both cases are not suitable for the quality of the print. However, over-extrusion is better because it can be fixed, while under extrusion causes spaces in layers, resulting in parts that are prone to severe damage and are relatively fragile.
 Does the 3D Printer Give Feedback on the Extruded Material?
Unfortunately, printers don’t provide information on how much filament they extrude. Nevertheless, it’s easy to know when your print is over extruding – it will be spitting out a lot of layers.
The question is past what over extrusion looks like in 3D print, and it’s now what must be done to fix it because it’s sometimes unavoidable. This article has covered everything you need to know about 3D print over extrusion, what causes it, the harm it does, and what must be done to fix it. However, try to take the necessary precautions before you start printing to avoid wasting your material because of over-extrusion.
It’s also essential that you don’t have under-extrusion. Although it’s bad for your print to over extruding, under extrusion is worse. Just remember: over-extrusion can be remedied.