Nothing is as frustrating as stringing in 3D printing, especially if you have no idea why it is occurring. If you are just getting started with 3D printing, don’t throw in the towel yet. Print errors like stringing are commonplace, and anyone, whether a beginner or a professional, can have trouble with their PLA pulling strings.
3D print stringing is also known as oozing, and it occurs when small strings of plastic remain behind a 3D printed model. Plastic oozes out the nozzle when the extruder is moving to a new location. The good news is that stringing can be prevented with a couple of solutions. Retraction is the most popular setting used to curb the issue. It works by pulling the filament backwards into the nozzle to block oozing every time the extruder is done printing one section of your model. This article explains the causes of 3D print stringing and how to prevent it.
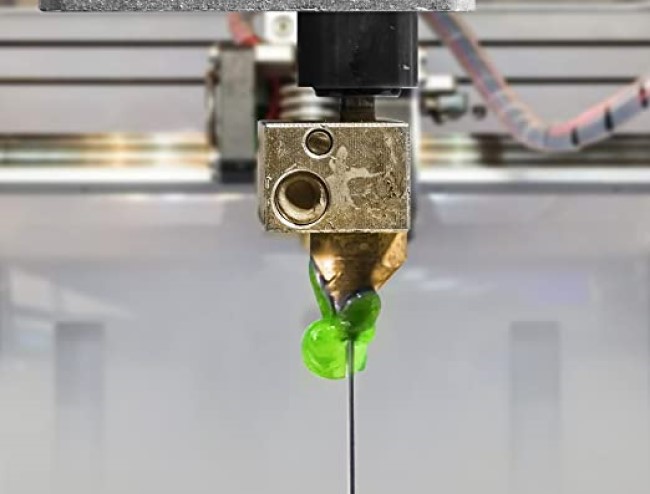
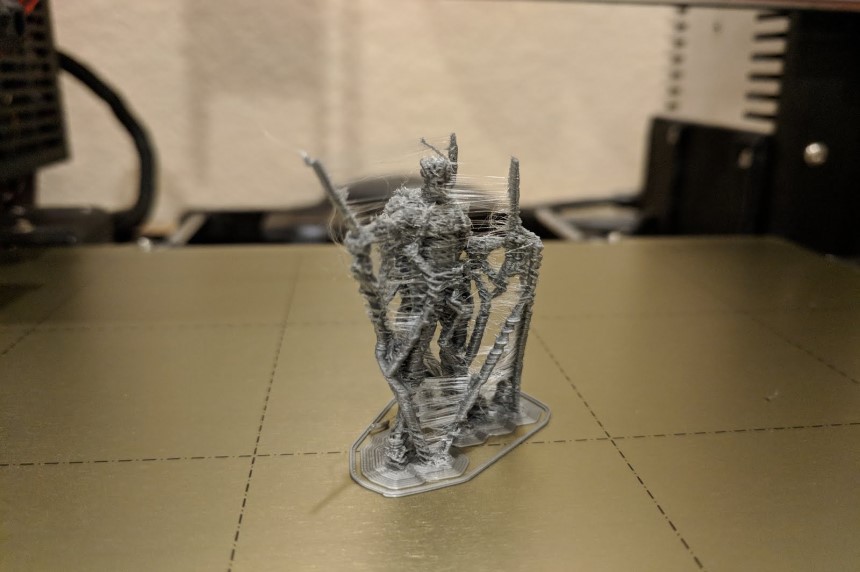 An FDM printer nozzle moves across an open space to get to the next point, and sometimes it oozes melted plastic in the process. The plastic solidifies and sticks to your printed parts, looking like cobwebs or strands of hair.
Your printer’s nozzle is not supposed to deposit plastic during the travel move. A travel move refers to the movement of the tool head from one point to another without extruding any filament. It’s just that the likeability of molten plastic leaking onto parts it shouldn’t and leaving your prints with what looks like whiskers is high.
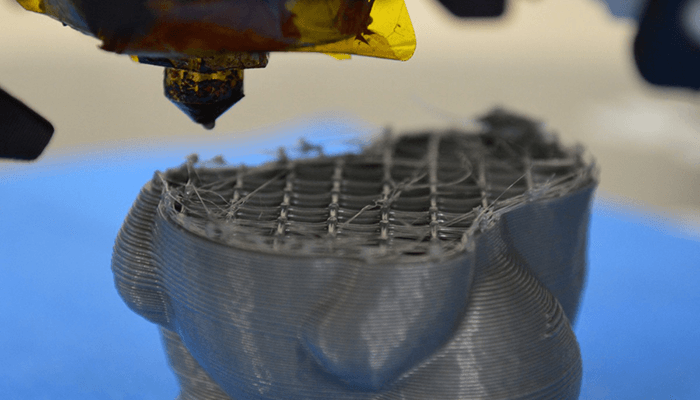
Models with larger gaps tend to experience stringing more because the tiny bits of filament only appear where there should be a gap in the model.
The main cause of 3D print stringing is the use of incorrect retraction settings and setting of the hot end temperature too high. That said, filaments that require high temperatures to print are more prone to stringing. Let’s say you are using PETG filament; you have to set the temperatures too high for it to melt. The high temperatures already make it susceptible stringing.
There are a couple of things you can do to prevent 3Dprint stringing like:
This is the most popular method used to combat 3D print stringing. When you enable retraction, the filament gets pulled back just a little bit by the feeder, where the extruder is supposed to travel across an empty space. The pull-back action is a countermeasure against oozing. When the extruder reaches the next location, the filament gets pushed back out, and the printing process resumes from the nozzle again.
Some applications like Cura come with retraction enabled by default. Be sure to countercheck to avoid any inconveniences. If you start experiencing stringing, the first thing you should check is if the retraction setting is on. If it is on and you are still experiencing stringing, then you need to look into the retraction settings further.
This is one of the most crucial retraction settings. It determines how far the filament travels. If your printer’s nozzle can retract further, then it is highly unlikely that you will encounter 3D print stringing. The danger in retracting too far is that the filament may be unavailable in the hot end when printing should resume.
Retraction distance varies according to the type of extruder being used. You have to perform retraction test prints to establish the correct retraction distance.
This is how fast the filament is retracted. The faster the retraction speed, the less likely 3D print stringing will occur. This is simply because the filament is pulled back fast enough before it starts oozing. On the flip side, when the retraction speed is too fast, the filament may disconnect with the other portion in the nozzle. Also, a rapid movement of the drive gear may grind the molten plastic and jam the nozzle.
The optimal retraction speed is something between fast and slow. This speed can vary depending on the print material. Therefore, you need to perform a few test prints to get the ideal retraction speed. If you are not too sure about the speed thing, check out programs that come with pre-configured profiles. They are a great place to start if you are looking for the most optimal retraction speed and you have no idea where to start.
For you to get the correct retraction values, you must first establish the type of printing material and extruder you will be using.
For instance, ABS and PLA do well with a speed of 40 to 60mm/s and a retraction distance of 0.5 to 1.0mm with direct-drive extruders. If you are using an extruder on a Bowden, set up a speed of 30 to 50mm/s, and a retraction distance of 2.0mm would be optimal. Do keep in mind that these figures can change anytime based on a couple of variables.
If you do retraction correctly, you won’t experience any stringing, and you will have better control over your prints.
Setting the right print temperature is another effective way of preventing stringing. At higher temperatures, the printing material melts and becomes more liquefied. This makes it prone to dripping from the nozzle even if you get the retraction settings correctly. That said, you need to set the temperature lower.
The optimum printing temperature depends on the material you are using and other printing settings. However, when you notice stringing, and your retraction settings are all good, it is recommended that you lower the print temperature. You can start with little increments of about 5 to 10 degrees Celsius. Just be sure not to go below the manufacturer’s minimum recommendations.
If you are not sure about the ideal temperatures for different printing materials, get a temperature calibration tower. Here is list of the most common filaments and their temperature requirements:
ABS: 200-250 °C (90-100 °C print bed)
PLA: 180-220 °C
PET: 215-235 °C
TPU: 230-250 °C (60 °C print bed
TPE: 210-240 °C (20-70 °C print bed)
PVA: 160-190 °C (60 °C print bed)
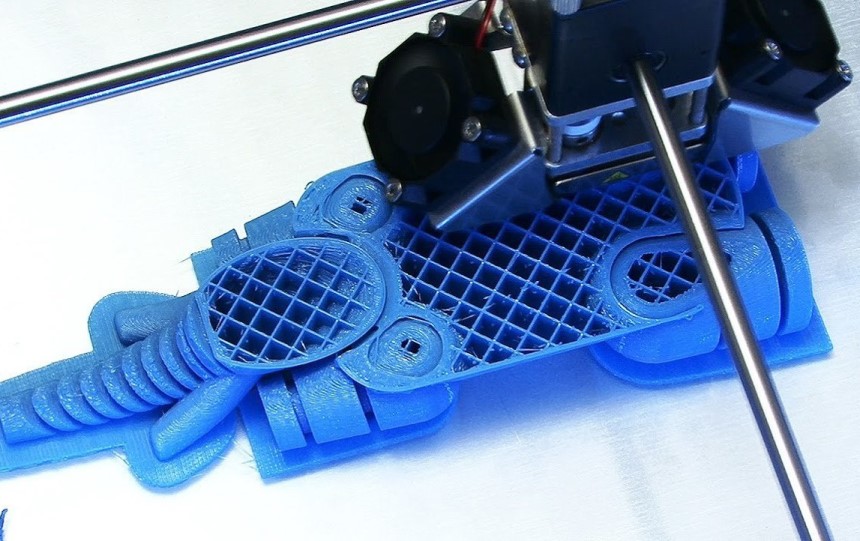 Print speed is one of the main factors that contribute to 3D print stringing. If your nozzle takes too long to move between 2 points, the likelihood of stringing occurring is high because the molten plastic has more time to ooze out of the nozzle. If the extruder can travel faster, the nozzle will have shorter moves, reducing the chances of oozing.
Again, you have to get the optimum print speed because with a high print speed and low printing temperatures, you can experience under extrusion Trusted Source Under Extrusion Problems or Clicking Sounds? Has this ever happened to you? You set up a print job to run. Everything starts smoothly and looks good. The material is flowing well. rigid.ink because the plastic won’t have enough time to drip. A print speed of 190 to 200mm/s is perfect for most printing materials.
As for the printer’s speed, you have to figure out your unit’s settings before making any adjustments. For most printers, the XY axis movement speed usually represents the travel speed from side to side. This speed is normally related to the amount of time the nozzle is meant to spend moving across the empty space.
Pro tip: If your machine comes with the combing setting, enable it. Combing recalculates the travel path to reduce any travel moves outside the object. Although there would be lots of extra travel, any stringing will be well-hidden inside the model.
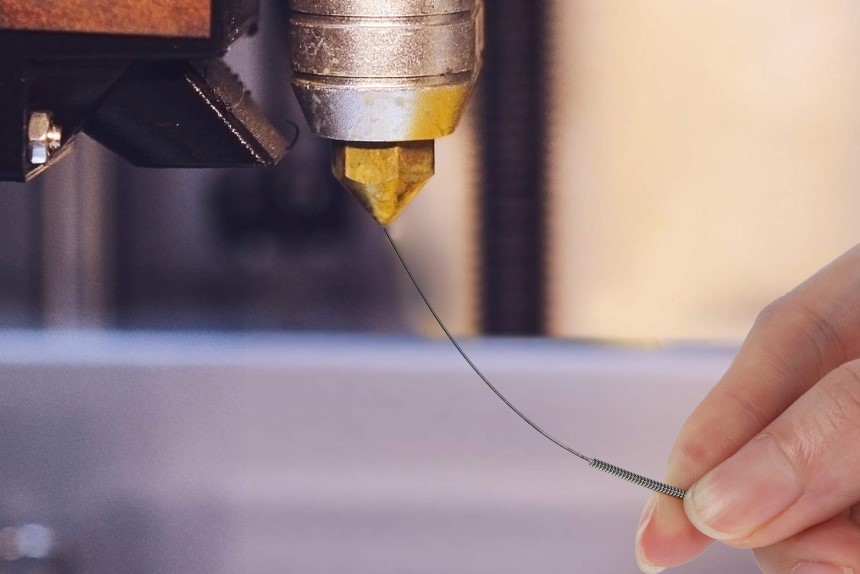 A thin layer of residue can form in the nozzle when the printer is used for a long time. This especially happens if you use the same printing material for a long. The thin layer can cause stringing when the filament strands stick on the surface of the printed part.
Cleaning your nozzle thoroughly before printing is enough to take care of this problem. Invest in a proper nozzle cleaning kit. You can get one online. Here’s how to clean a nozzle;
You can activate the wipe setting on your printer if it comes with one. It ensures the nozzle is cleaned of excess filament before emptying. The wipe function also prevents ugly dents at the transition points between layers.
Better yet, you can replace the entire nozzle. Sometimes stringing occurs because of a damaged nozzle. Check if your nozzle is corroded, poorly drilled, or damaged in any other way. Some printing materials like carbon and glow-in-the-dark filament are notorious for damaging nozzles. If you recently just finished a project with either, check your nozzles for any damages. When replacing your nozzle, go for the high-quality ones made of hardened steel.
Here is how to quickly replace your nozzles;
 Whether you are using
hygroscopic filaments
Trusted Source
Hygroscopy (3D Printing): What It Is & How to Deal With It
Have you ever printed with old filament or material that’s been exposed to humidity? If you have, you probably ran into some print quality issues.
rigid.ink
that absorb moisture from the air like PLA or non-hygroscopic ones like ABS, you have to ensure they are dry before beginning the printing process. If the filament has moisture, it turns into steam when it is heated. The steam can mix with the melted plastic increasing the risk of oozing during non-print movements. Moisture also makes your printing temperature unreliable. And can result in zits and blobs, which are more unsightly than stringing. If you live in a humid environment, make a habit of storing your filaments in a moisture-free environment. Here is more on how to dry filaments.
Whether you are using
hygroscopic filaments
Trusted Source
Hygroscopy (3D Printing): What It Is & How to Deal With It
Have you ever printed with old filament or material that’s been exposed to humidity? If you have, you probably ran into some print quality issues.
rigid.ink
that absorb moisture from the air like PLA or non-hygroscopic ones like ABS, you have to ensure they are dry before beginning the printing process. If the filament has moisture, it turns into steam when it is heated. The steam can mix with the melted plastic increasing the risk of oozing during non-print movements. Moisture also makes your printing temperature unreliable. And can result in zits and blobs, which are more unsightly than stringing. If you live in a humid environment, make a habit of storing your filaments in a moisture-free environment. Here is more on how to dry filaments.
Besides being dry, the filament ought to be clean and of good quality. With poor quality filament, you cannot get the best results even if you get your settings right and you use the best quality 3D printer. After all, filament is the primary factor in 3D printing, it can make or break your prints. Go for filaments from reputable brands like the popular SainSmart TPU filament. It is compatible with all the FDM printers on the market that accept a 1.75mm filament. It is a top choice for many because it offers excellent bed adhesion and zero warping tendencies.
The OVERTURE PLA filament is another prime example of a high-quality filament. It offers excellent value for money with its wide compatibility, clog-free, bubble-free and less-tangle nature. Using it and feeding is such a breeze thanks to its large spool inner diameter.
You should also keep your filaments clean. Dust and other particles stuck on your filament can compromise the quality of your 3D prints. Invest in a good filament cleaner, or simply 3D print yourself one. It’s a simple plastic box, in which you place a sponge and pass your filaments just before moving into the extruder.
3D print stringing can make you beat up yourself. It is a waste of both time and resources and very demoralizing to anyone who just got their foot into 3D printing. Luckily, there are a couple of measures you can take to prevent the printing error. All the solutions we have provided in this guide should be able to help you stop your hatchbox pia or ender 3 from stringing.
Remember 3D printing is mostly about trial and error. You have to give every solution a shot before giving up on your printer. If you are able to diagnose it early, good for you, if not try everything before seeking technical support from a professional. The first settings that need tweaking when you notice stringing are the retractions settings. Check if it is enabled before adjusting the distance and speed.