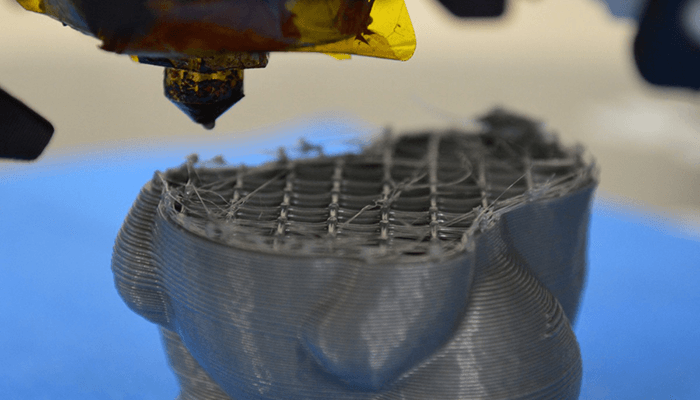
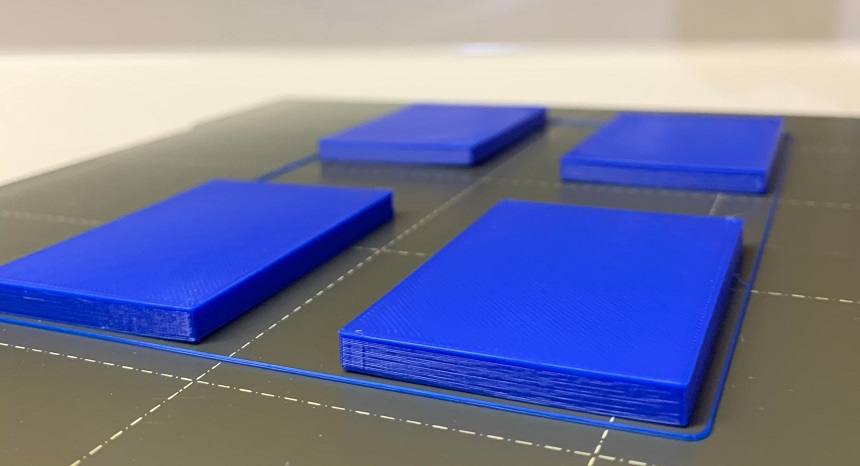
Warping is the biggest 3D printing challenge every maker dreads when printing parts. Essentially, warping is the distortion of an object during the 3D printing process and is caused by large temperature differences between layers of extruded plastic. Tension develops within the model, and the lower layers begin to drag or drift to form a warp. It is easy to detect as you will notice a part of your object curling upwards.
The curling usually occurs at the corners of the object to be printed. The higher the temperature you need to melt a material, the higher the probability of getting warped prints. However, there are a couple of other conditions that favor warping, including leveling errors, dirt on the print bed, and poor heat distribution on the print bed. This article looks deeper into 3D warping. Read on to find out why it occurs and how to prevent it.
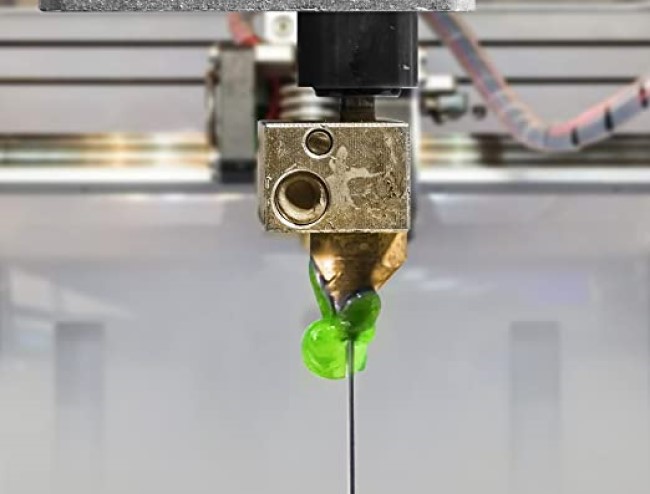
FDM 3D printing uses thermoplastic filaments Trusted Source 3D printing (additive manufacturing) of medical devices or component parts during the coronavirus (COVID-19) pandemic The requirements for 3D printed products will depend on whether they are classed as medical devices, personal protective equipment (PPE) or both. www.gov.uk that can turn into liquid when melted and solid when cooled down. The filaments are heated beyond their melting point until they turn into liquid so that they can get extruded onto a build plate. When the thermoplastics cool down, colder layers contract and pull on the hotter layers. If this happens when the colder layers are above, the hotter layers, the 3D printed object loses its grip on the build surface and curls upward.
On your worst day, warping can happen when a good chunk of the printing job is done. Here are details on different types of 3D print warping;
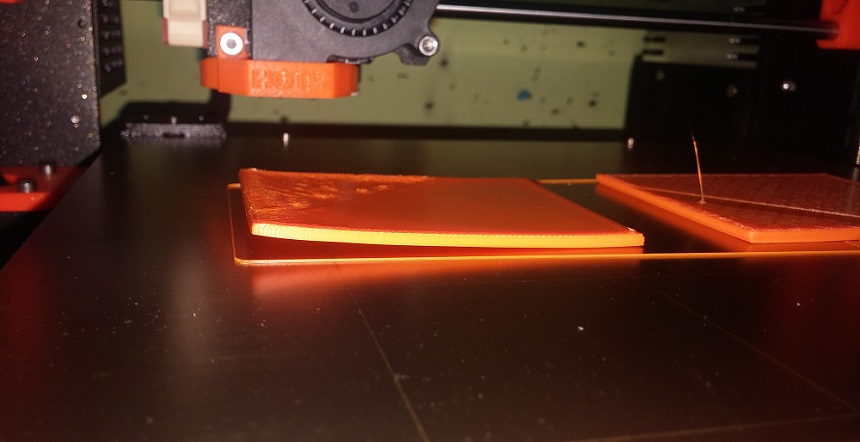
Print bed warping often occurs with large prints. The large prints accumulate more warping forces than usual, and although the build plate sticks well to the print, it bends along with it. A rapid cooling process and an unevenly heated bed are some of the causes of warping on print bed.
Your object is likely to warp off the bed if the print bed is too hot. A hot print bed allows the heavier layers to compress the lower layers forcing them to sag and flow outwards.
Printing PLA requires about 250 degrees Celsius in the nozzle and about 100 degrees Celsius in the printing base. PLA, on the other hand, only requires 200 degrees Celsius in the nozzle and 50 degrees Celsius at the printing base. Remember, the higher the temperature, the higher the chances of contraction, which causes warping. Therefore, PLA is not prone to warping like ABS.
Warping on one side

If you only experience warping on one or two corners of your print, an unwanted tilt of your print is the probable cause. In rare cases, the print bed may be curved.
First layer warping
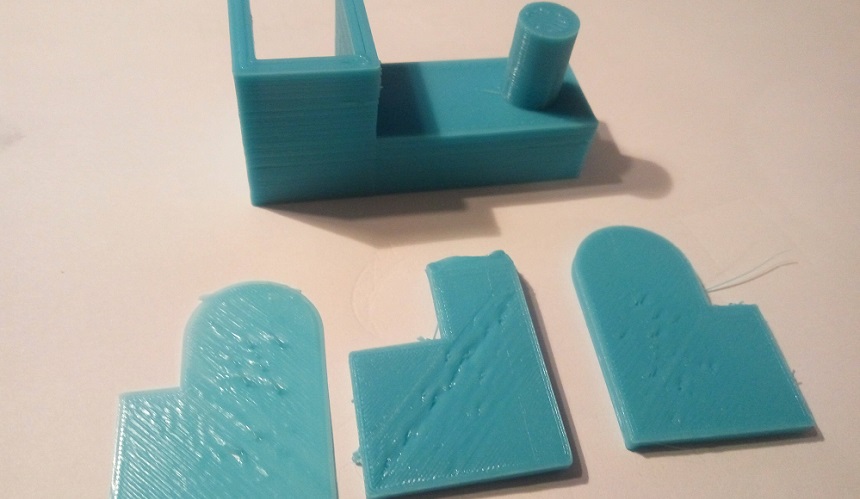
If you find that the few bottom layers of your print are spread out wider than the rest of the print, it could be either your bed is too hot, or you have your nozzle too close to an overly-hot bed.
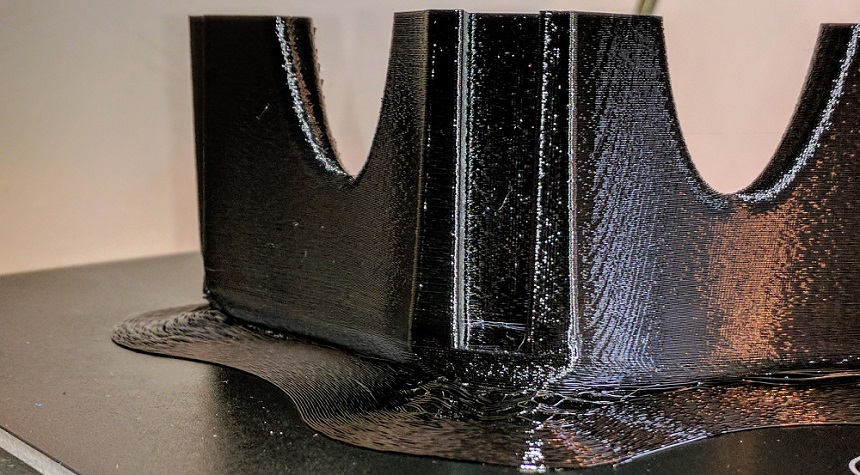
Corners lifting
The corners of your prints may lift because of the upwards stress that occurs when two flat surfaces meet.
3D print warping is almost inevitable, and every maker is bound to have a few experiences in their printing escapades. Luckily, the problem is preventable, and here are a few hacks worth trying;
You can adjust the slicer settings to prevent warping. The brim, skirt, and RAFT functions will help you prepare the pieces, which is an essential step in preventing warping. Moreover, warping is more prevalent in the corners than in the rounded parts of the print. A round corner will always improve upward tension, which means less stress and deformation. Therefore, you can try to add rounded corners in the design phase.
Slower printing is a solid solution to most stubborn prints problems like warping and curling. Lower the speed and the nozzle temperature accordingly to avoid warping.
These are small discs that are a couple of layers high printed under your parts to improve adhesion on corners. You can use CAD software to draw your own mouse ears or get ready-made models online, then place them on the build plate in your slicer. Ensure they are not touching each corner of the model so that you have less trouble removing them from your model when you are done with the print job.
This setting is meant for cleaning the nozzle before starting printing, but you can adjust it to increase the adhesion of your prints to the printing surface. You can do this by setting it up to create a certain number of perimeters at zero distance around your piece.
Unlike the Brim setting, the skirt setting makes a contour at a distance from your piece. The contours form rings that don’t touch the piece. You can use the skirt setting to make a contour that’s about 10mm away from the part but with an identical height that will act as a shield.
The shield will retain and conserve the heat better, increasing the probability of a successful print.
This setting creates a raft that is printed right on top of the build platform to improve the print’s adhesion and prevent warping. Your object is printed on top of this raft, and you will appreciate the great adhesion it offers.
The temperature of your printing surface is one of the top determining factors of warping. You must get the temperature settings right to reduce the chances of your print coming off while keeping it warm throughout the whole printing process.
When printing with filaments that require high temperatures like ABS and nylon, you can set a temperature of at least 90 degrees Celsius on your printing bed. Another thing you could do is increase the standard temperatures normally used for different filaments. For instance, instead of the standard 50 degrees Celsius used to print PLA, you can use 80 degrees Celsius to increase the adherence of the print to the bed.
You must also ensure there is an even distribution of heat on your printing bed. You can set it as 100 degrees Celsius, then wait for 5 to 10 minutes before you begin printing. Just because your thermistor reads 100 degrees Celsius doesn’t mean the entire bed is that hot.
Some printing beds don’t heat evenly, which is also a primary cause for warping. Unfortunately, there is no easy solution to this except upgrading your bed to a higher quality model.
Drastic temperature changes in your working environment is another issue. The ambient temperature can lower your print bed’s temperature significantly. Check if the windows are open or there is a fan in the room that can alter the temperature of your impression base. Alternatively, you can use an enclosed print chamber to maintain consistent temperature levels during the entire printing process.
Another thing you could do is lower the speed or turn off the fans directed to the 3D print to even out temperatures enough to keep your print flat on the bed.
Dirt and grease can take you back to zero when it comes to warping even if you have the best adhesive printing surface. Before you begin printing, ensure your printing surface is clean and leveled.
You can use Isopropyl alcohol or an ammonia-based product like Windex to remove fingerprints and grease from your printing surface. Cleaning increases the chances of your model adhering to the printing surface, thus preventing warping.
To level the build plate correctly, ensure the first layer of your print is firmly pressed onto the printing surface. If you leave a wide distance between the nozzle and the build plate, the material gets loose easily.
You can use a level sensor for the most accurate build surface leveling. If you printer is not an auto-leveling model with a self-leveling sensor, you can buy one separately.
Improving the adhesion of your bottom layer to the print bed goes a long way in preventing the corners of your model from lifting. Adhesion promotion primarily involves coating the print bed in a layer of a sticky substance before printing.
There are multiple products on the market that you can use to improve the adhesion of your pieces to the printing base. Whichever adhesive you choose to use, ensure you do a test print to confirm that it works well. It shouldn’t be too strong that it damages your model when you try to take it off.
Here are some of the best adhesive products you can use for adhesion promotion:
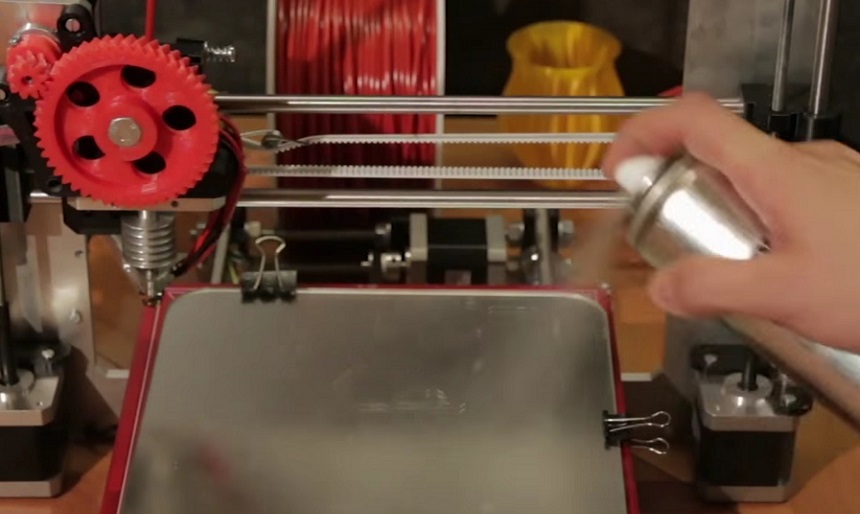
This is a spray format product, designed for use in 3D printing. It has a strong chemical formulation that gives it a strong adhesion to the pieces. It is incredibly easy to use, all you have to do is spray a small amount of it on the printing base before you start printing. A little goes a long way and for even distribution, spray it from a distance.
In place of 3DLac, you can use the Nelly hairspray. It is made by the same company that developed 3DLac. In fact, 3DLac is just an improved formulation of the Nelly hairspray without the lacquer smell.
The 3DLac 3D printing adhesive is popular because it offers unmatched firm adhesion and quick release. You will love how firmly it adheres to prints and print beds, and is incredibly effortless to remove. You can use it with virtually all printing materials including ABS, PLA, PETG, Nylon, and TPU among others.

PEI offers accurate adhesion with nearly all materials except nylon. It comes laminated and you can easily place it on the print bed. Moreover, the sheets come in different sizes, so you will never have trouble finding one that fits your print bed. Some come with double-sided stickers that you can easily remove before installation.
PEI sheets are usually 0.2mm thick and you can easily trim them. Best of all, you will not experience bubble problems that other adhesives like Kapton and tape have.
Gizmo Dorks is one of the most acclaimed PEI sheets brand because it offers an easy bubble-free application. You only need to peel back the tape liner for quick adhesion to the bed. Removing it is equally easy with isopropyl alcohol or acetone.
This is another fantastic commercial 3D printing adhesive. It is chemically formulated to increase your model’s grip and it comes in multiple variants. It can be used with various materials, including nylon-based filaments.
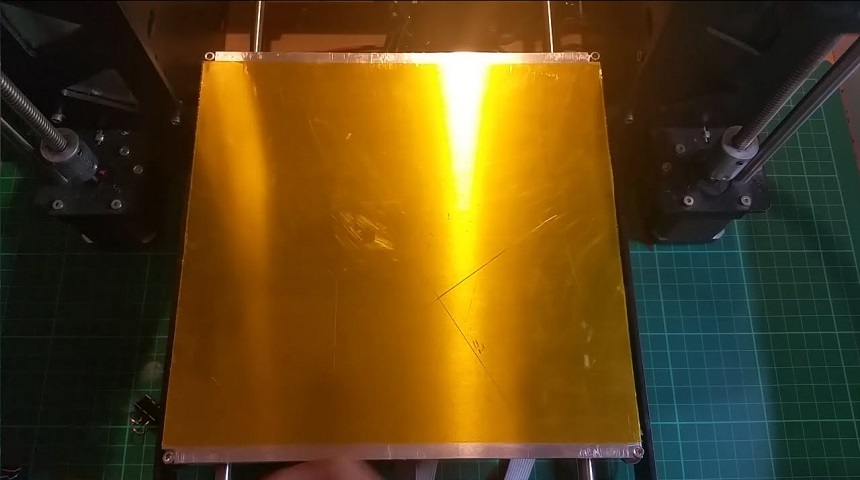
Kapton tape is commonly used in electronics to protect components during welding or stripping. It can withstand extremely high temperatures and is ideal for improving adhesion on any printing surface.
You can combine Kapton tape with some type of spray like 3DLac or Nelly to significantly improve the grip of your parts. The tape comes in different widths. Go width wider widths for easy application on the printing surface. The only downside with Kapton tape is its tendency to leave some residue behind when removed the print bed. You can use alcohol and a plastic scraper to get rid of the residue.
This is one of the most obvious options as some printers come with a glue stick in their packaging when purchased. A glue stick is super easy to use. You only need to apply some of it to the printing surface before starting printing.
For even distribution, you can mix it with water then use a brush to paste it onto the printing surface. You will end up using a small amount and cleaning won’t be a hassle.
This is the cheapest and most accessible option. You can easily get masking tape in the nearest general store and like Kapton tape, it offers great adhesion. Go for the wider tape for easy application and to enhance its adhesiveness, you can use it with a little 3DLac or Nelly.
This is a great way of increasing adhesion when using ABS as your printing material. You can mix ABS with acetone to create a solution that you can apply on the printing surface with a brush. Cut a few pieces of the ABS filament, then place them in a container and add some acetone. The ABS will dissolve completely.
Eliminating all drafts is essential in reducing the chances of warping. Remember, warping is likely to occur if your model cools quickly. Therefore, a slow and steady cooling process is the key to preventing warping.
Consider printing in a room with a consistent ambient temperature. Someone opening the door while you are printing is enough to cause warping. You can ask people to keep off the room during printing so you can close the doors or windows and do everything you can to maintain a steady ambient temperature.
An enclosed printer is a sure bet when it comes to preventing warping. Besides warping, an enclosed printer prevents cracking, which like warping, is caused by temperature retractions. If your printer is not an enclosed model, you can improvise and make enclosures yourself. There are various ways of creating enclosures including using a table, a methacrylate box, or a regular large box.
Further, there are commercial enclosures that are flame retardant and can fully cover your printer on the market.
You can adjust the design of your print pieces to prevent warping. For successful printing Trusted Source 3D Printing Safety at Work 3D printing, or additive manufacturing, is increasing in popularity. This technology is becoming less expensive and more accessible to both businesses and consumers. It is currently used in a wide variety of settings, such as labs, factories, hospitals, schools, libraries, and homes. www.cdc.gov , consider designing objects that have rounded corners. Rounded corners make better use of the upward stress that occurs when two or more flat surfaces meet by distributing it over a wide area. With less stress, warping and curling are highly unlikely to occur.
Pro Tip: You can actually fix a warped print if its bottom is slightly warped, and it’s not so thick or large in volume.
Warping is a dreadful experience in 3D printing as it is a waste of resources. Luckily, it is easy to detect and can be prevented in myriad ways. Once you establish why you have repeated cases of warping, you will be able to curb the issue easily. One of the primary causes of warping is uneven cooling after printing. Cooling causes contraction, which causes stress along the object’s lateral surfaces. The stress is much more with quicker cooling and it deforms the object.
That said, there are 3 main ways of preventing warping; reducing cooling time, increasing ambient temperature, and improving your print bed adhesion. We have covered all the simple ways of doing all the three in this article so you can choose what works for you.