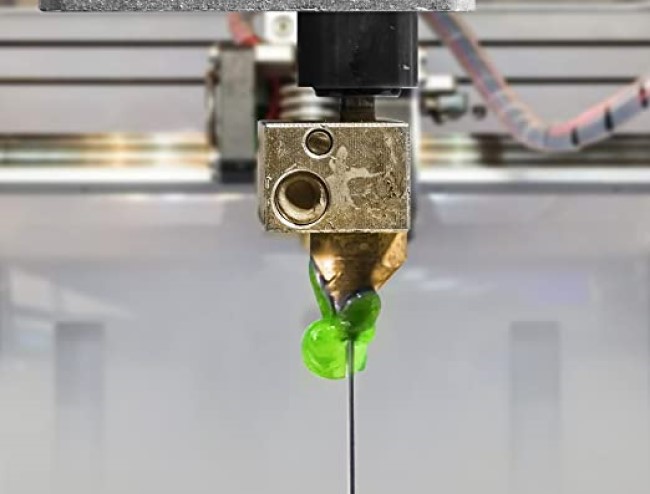
As a 3D printing hobbyist, you will need to optimize, adapt, and optimize your 3D models at some point. Therefore, you ought to learn how to edit STL files. Most times, the pre-downloaded STL file on your model are okay, but what if it lacks some features, or it is damaged? Sometimes you’ll only need a part of it. This is when you realize you need an STL editor.
STL files can be edited in 2 different types of modelling software: the CAD software and Mesh editing tools. The CAD software is made for construction, solid modeling and providing the exact measurements. The Mesh editing tools, on the other hand, are made for modeling, animation, and any objects on a 2D surface without a filling. They are better tools at editing STL files. In this article, we will provide a comprehensive guide on how to edit STL files as well as discuss some of the best STL editors.
According to the latest reports Trusted Source STL (STereoLithography) File Format Family Format Description for STL_family — an openly documented plain text format for describing an object as a triangular mesh, i.e., as a representation of a 3-dimensional surface geometry in triangular facets. Each facet is described by a perpendicular (normal) direction and three points representing the vertices (corners) of the , triangle. The STL format was developed for stereolithography, a form of 3D printing, in the late 1980s. www.loc.gov , the STL file format is a proprietary format with an extremely simple structure that describes the surface of an object as a triangular mesh. Editing an STL file is not rocket science. You don’t even need the skills of a 3D designer to do it yourself.
You have 2 main options when it comes to editing STL files: mesh editing tools and CAD software.
These are programs designed to cover engineering and construction modeling purposes. They are solid modeling tools and they provide accurate measurements. Although they were not originally designed with 3D printing in mind, they come in handy in editing STL. They are not the best option because of the different ways in which they represent some shapes. For example, In the CAD software, circles are represented in their ‘real’ shape while in 3D printing and STL editing are usually represented as polygons. Therefore, CAD software tools cannot show their real strength in STL file editing. Some of the popular CAD programs include: FreeCAD, Sketchup, and Blender.
These are the best for editing STL files because they are designed for modeling and objects represented on a 2D surface without filling. This means that the objects only have a shell and you have to solidify them before 3D printing.
These are some of the most popular free STL editors you can get:
This is a CAD software that is free to use. It is an open source that offers different tools for construction including drawings, drafts, and design features. It supports full parametric modeling and multiple 2D handling tools used for drafting purposes. There are a couple of add-ons that extend the software’s capability extensively.
The tool can be used by both beginners and seasoned 3D designers. It is super easy to use and is a top preference for architects and engineers because it was designed with mechanical engineers in mind. In fact, the software is meant for mechanical use more than modeling. Sculpting a model with it wouldn’t be as easy as constructing mechanical objects or fixing STL files.
FreeCAD is not the best STL editing tool but it gets the job done. Its downsides include problems with intercepting structures and the lack of a full-move around 3D view. The issues with the intercepting structures may mess up the mesh when it contains intercepting edges.
Here is how to edit or repair STL files in FreeCAD:
Step 1. Open STL file
Open FreeCAD then create a new document by going to File> New.
Click on File > Import then select the object you want to modify. Other mesh formats like OBJ and AST can also be opened by FreeCAD.
Change your workbench to part then select the object you imported in the model window.
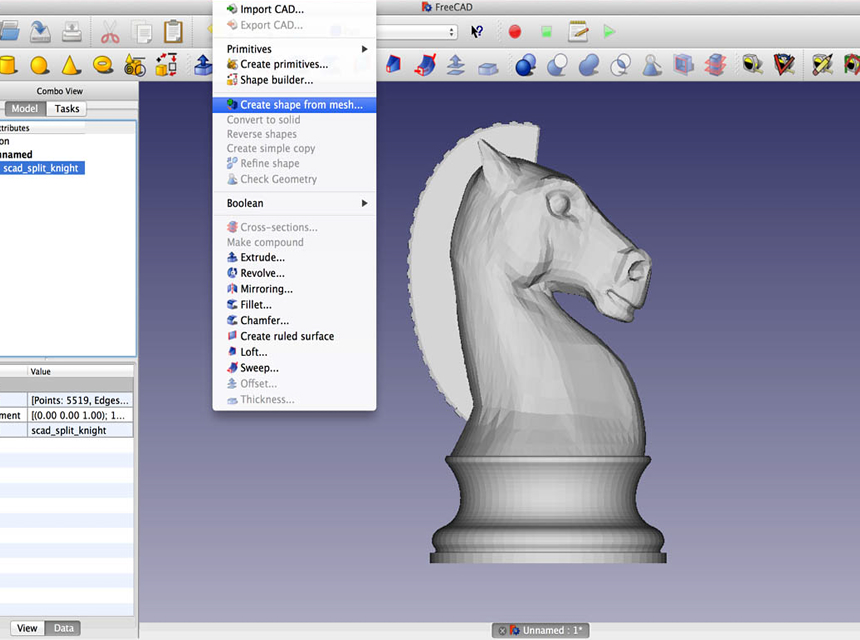
Click Part > Create shape from mesh to split up the imported object into multiple small triangles. The precision of tessalation can be adjusted but 0.10 is usually perfect for most objects. A smaller number would mean longer time taken to convert the object.
Next, delete or hide the imported mesh to get the shape of your imported object with multiple triangles.
To create shapes, Click on Advanced utility then select solid from shell. Click on any triangle that forms your imported object then click create. You won’t notice any difference because the shape is overlapping the solid. Click on Close to finish.
Delete or hide the original shape to remain with the solid object of your mesh file ready for editing.
Step 2. Edit the STL files
Start by changing the workbench to part design.
Choose anywhere you want to add or remove material. The face you choose should shine green.
Click on create sketch, then create the shape you want to manipulate with the drawing tools.
Confirm the sketch by clicking Close. In case you want to edit it, double-click it in the model tree.
Now choose the feature you want to apply. The pad tool for extruding and the pocket tool for cutting are some of the most commonly used tools.
Step 3. Repair STL
FreeCAD comes with an extensive mesh repair tool. To repair STL, start by selecting Meshes, then Analyze, then Evaluate and repair mesh.
If you know the defects your mesh has, pick the appropriate item in the list then click Analyze. If not, choose All above tests together, then click analyze.
When the analysis is done, click Repair.
Step 4. Export STL file
Select the last feature in the model tree then click File > Export and choose mesh formats. This will export your object as an STL file.
This is another free CAD program. It is developed by Autodesk and its main purpose is to use basic shapes or primitives as building blocks to create 3D models. The program can also be used to import and edit STLs. It comes in handy for simple edits like adding text, removing part of the design, and combining two STLs into a single model.
Although the program is incredibly easy to use and runs smoothly with all the basic tools needed to create a simple 3D model, it lacks some key features that a proper STL editor should have. It doesn’t come with tools for mesh repair and surface modeling.
You can get the popular Tinkercad for Dummies 1st Edition for more information about the program. The book has all the information that can guide you on creating 3D models, planning your designs, and using the tools optimally.
Here is how to edit STL files using Tinkercad:
Step 1. Import STL
If you don’t have a Tinkercad account, sign up for one then log in.
Open a new design.
Click on Import.
Select choose a File.
Choose your preferred STL then click OK.
Step 2. Adjust the size and scaling
Tinkercad offers a basic overview of the STL with its part dimensions before you import it into the workspace. To get a particular scale for your design; enter the desired scaling percentage or dimensions into the field then click import.
Tinkercad may take a while to upload the file into the workspace depending on its size and complexity.
Step 3. Edit the STL file
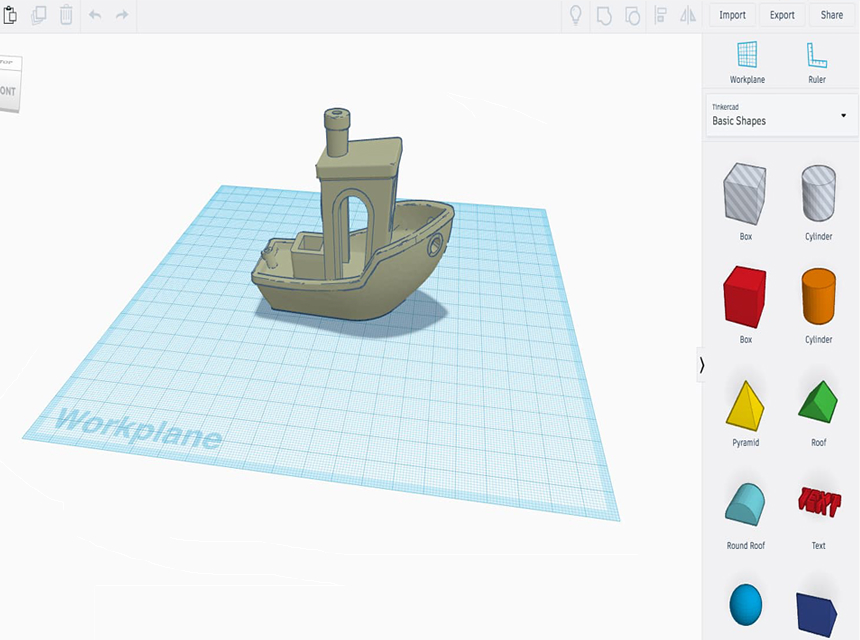
Once your file has been imported, you can edit it using any of the basic shapes, shape generators, or many other shapes provided by the program. What’s more, you can import other STL files and use them to modify your design further.
In case you feel your design still needs size and scale adjustments, you can use the drag points within the workspace to make appropriate changes.
Step 4. Export as STL
Once you are done editing your design, you can export it as an STL.
Select all the items you want to export then Click on Export.
Follow the prompts provided to export the design as an STL file.
Blender is a fantastic free program designed to create models for printing, video clips, or games. It features various useful tools including algorithms for smoothening or interpreting a surface. Importing and preparing STL files for modeling with blender is a breeze. However, it needs getting used to as it features a vast number of tools and commands that make it a little obscure.
You also need a powerful PC to use the program if you want the models to be displayed well. To get more knowledge on Blender, get the highly acclaimed Blender 3D by Example 2nd Edition. The guide has a couple of practical concepts that will help you master the core concepts of 3D design.
Here is a step by step guide on how to edit an STL file with blender:
Step 1. Open the STL file
Hover with your mouse above the Cube and press the DEL button to delete it.
Click on File, Choose Import, then STL. Browse the file you want then import it.
Step 2. Edit STL file
Start by changing from Object to Edit mode. You should be able to see all of your model’s edges.
Select all the elements by hitting ALT+L. The model should shine orange. In case you only want to select individual points or edges, right-click on them.
Hit ALT+J to covert triangles into rectangles.
Change the number of tiles that make up the model using the sub-divide tool. You can either search or right-click to access the tool.
Use the Vertexes, Edge, or Face select options to extrude, move or delete parts of the model.
Add different shapes like Cube and Sphere to your model.
To cut or merge one form with another, use the Boolean command.
Step 3. STL repair
Besides the STL import feature, Blender comes with an STL repair tool.
Begin by activating the 3D print toolbox. Click on EDIT, then Preferences, then Add-ons, Mesh 3D Print toolbox.
Access the toolbox from the left sidebar. Your sidebar should be enabled under View. Press N to toggle the toolbox.
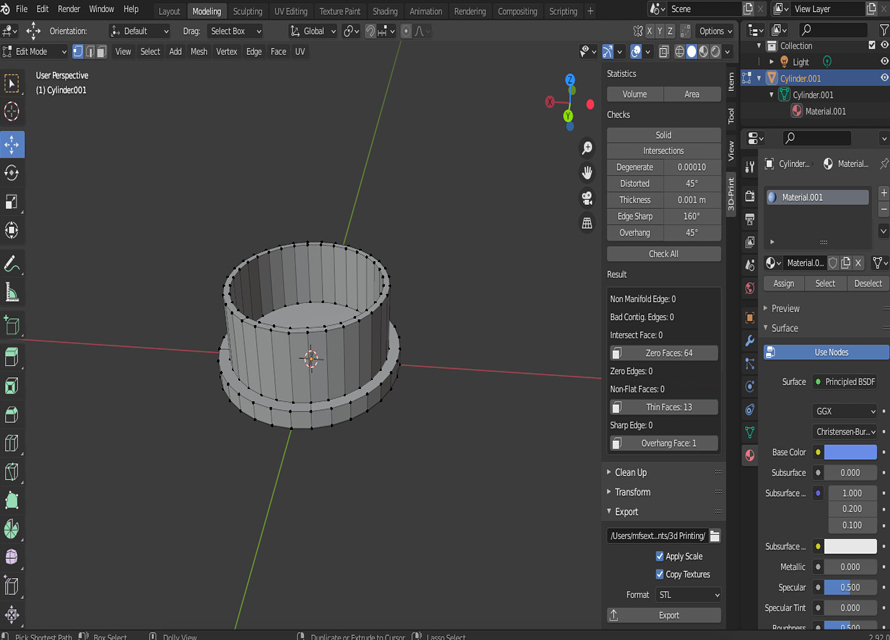
The best thing about blender’s 3D print toolbox is that it allows you to address all the common issues that would cause your STL file to print incorrectly like overhangs, wall-thickness, and manifolds.
You can actually check for all these issues by clicking Check all. A list of errors will appear on the bottom of the toolbox.
Click on Isolated to repair the Vertices or edges.
Step 4. Export as STL file
Go to File, then Export, then STL. Follow the prompts to save your file.
This is a free mesh editing software. You can get it from Autodesk’s website for your MacOS or Windows. It has superior functionality that allows you to work with STL files in different ways. You can edit and repair STL files with the program. According to professional developers, Mesh mixer is a state-of-the-art software best suited for working with triangle meshes.
The program comes with myriad features including support structure branching, hollowing and many others that make editing the meshes easy. It even comes with a built-in slicer tool that allows you to send the edited model directly to your 3D printer for printing. Quite simply, Meshmixer Trusted Source Meshmixer Tutorial: 15 Top Tips to Edit STL Files for 3D Printing This in-depth Meshmixer tutorial, for both beginner and advanced users, walks through 12 tips to help designers edit STL files and improve their 3D models. formlabs.com is one of the best tools you can use to edit your STL files as it takes into account all the occurring problems like paper-thin walls.
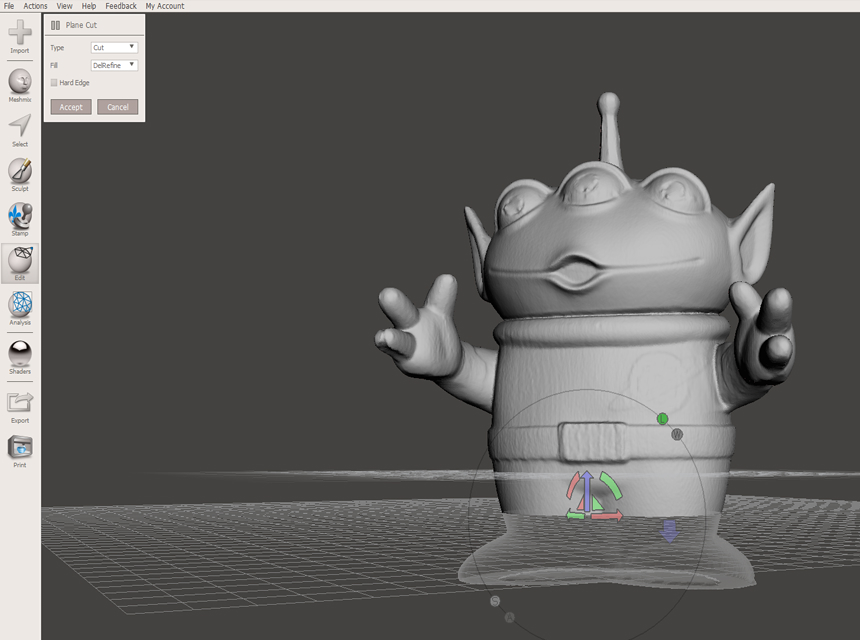
Step 1. Open the STL file
Click on Import then browse for your object.
Click on Edit then select Make Solid.
Step 2. Edit the STL file
Use select to mark the parts of your model.
Press DEL to remove marked tiles.
Open different forms with Meshmix. You can switch from basic forms to access more models. Drag and drop your object then use the different colored arrows to rotate or move it. For scaling, use the little square in the middle of the arrows.
To smoothen or extrude different parts of the model, click on Sculpt.
Step 3. Repair and Prepare STL for 3D printing
Select Print from the sidebar. You will find a vast range of tools that will help you prepare your file for printing.
Select your 3D printer from the drop down list. If your 3D printer’s model is not in the list, you can add it manually. Get the specs of the printer from its manual.
To repair your mesh, choose Repair Selected. It will fix all the holes and non-manifold vertices among other issues automatically. Moreover, you can adjust the minimum wall thickness of your mesh as well as hollow it to use less material.
In case you want to generate a support structure for your STL file, Click on Add Support then adjust the settings to suit your 3D printer. Click Generate Support > Done.
Once you are done editing your mesh to your preference, Click on Send to Printer.
Step 4. Export as STL file
Go to File >Export then choose the STL file format to export your object.
Meshlab is a free and open source program that anyone can use to edit STL files. It is a top preference for most professionals because it features numerous mesh and point cloud processing functions. Plus, it offers great possibilities when it comes to management of very large files.
The program comes with a wide range of processing tools including surface reconstruction, remeshing, mesh analysis, cleaning of errors, automatic smoothing and visual inspection. Meshlab is one of the most powerful tools for editing STL files. You cannot create an STL file from scratch with it but you can develop new models by merging existing ones.
What’s more, the program allows you to work on other files like OFF, OBJ, PLY, 3DS and point clouds.
So, how do you edit an STL file with Meshlab?
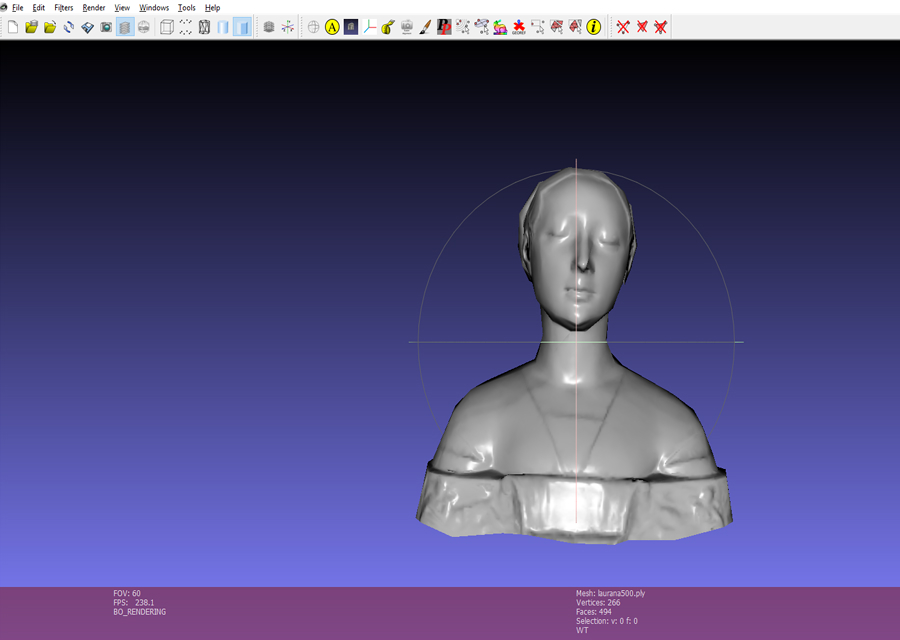
Step 1. Open the STL file
Go to File, then click open mesh and browse for your model.
Step 2. Edit the STL file
Unlike other STL editors, Meshlab doesn’t come with tools to create new vertices or objects. However, it is the perfect tool for combining 2 meshes of a 3D scan. You can even go as far as removing parts of the mesh and repairing holes in the model.
To merge 2 meshes:
To delete a part of the model:
To repair your model or look for defects (holes);
Click on Fill hole (this option only applies to manifold models).
You should see a window pop up with all the holes in the model. Choose the holes you want to fill then click on Fill > Accept to finish.
Step 3. Repair STL
Select Filters, then Quality Measures and Computations, then Compute Geometric measures. A volume for your file, or an error report will appear in the dialog on the right side. This will check if your STL is watertight.
If you find that your STL file is not watertight, select Filters, then Cleaning and repairing, then Merge close vertices then click Apply. Select filters again, Cleaning and repairing, then remove duplicated vertices. Repeat to remove duplicated Faces then click apply.
Countercheck your STL file.
Step 4. Export as STL file
Go to File then select Export mesh.
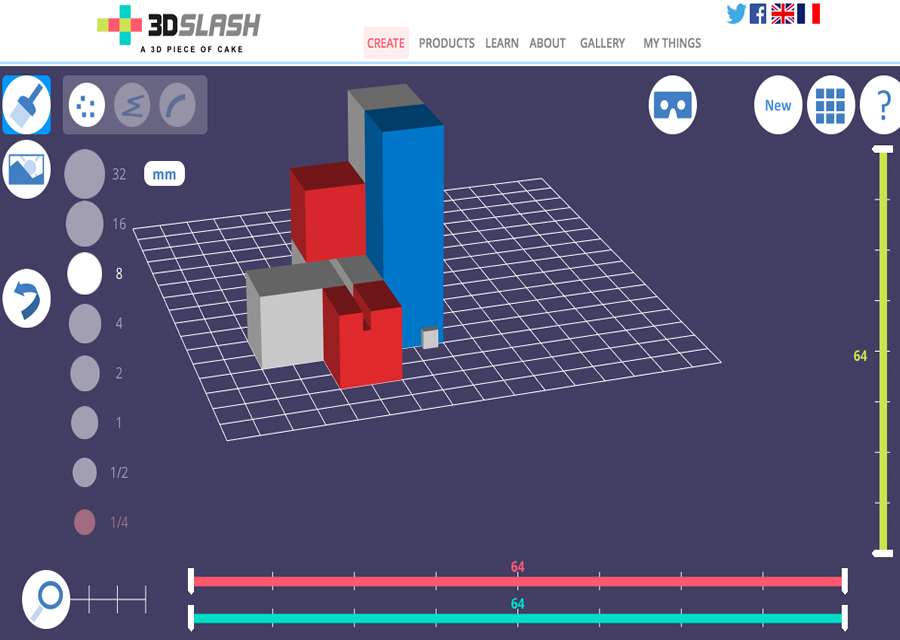
This is an easy-to-use and free 3D modeling software meant for creating 3D models with a simple building-block concept like that of minecraft. You can download it for free and access its 3D editor for free from your browser.
3D slash is a basic software, best suited for hobbyists more than professionals. 3D printing enthusiasts can easily edit their STL files with the program without the knowledge of 3D modeling software.
The only downside to the software is that you cannot save modified 3D models in the STL format with the free version. Although the user experience for the free version is limited, 3D slash is worth giving a shot, especially if you are a beginner.
Step 1. Open the STL file
Go to Start a new model then select From a 3D File. Drag and drop your file into the browser or browse for it in the hard drive.
Step 2. Edit the STL file
By now, the mesh has already been converted into a pixelated object that you can edit with this program.
Pick a tool from the options available in the upper left corner of the viewport. For example, the Hammer tool removes cubes, trowel rebuilds cubes, chisel removes cubes’ slices, wall rebuilds cubes’ slices, and drill removes everything inside the limits selected.
To get started with a new project, you can add other primitives.
On the left side of the viewport, is a palette, use it to adjust the sizes of the cube.
Step 3. Export as STL file
Select the floppy disk icon on the upper left corner then choose Save as STL file.
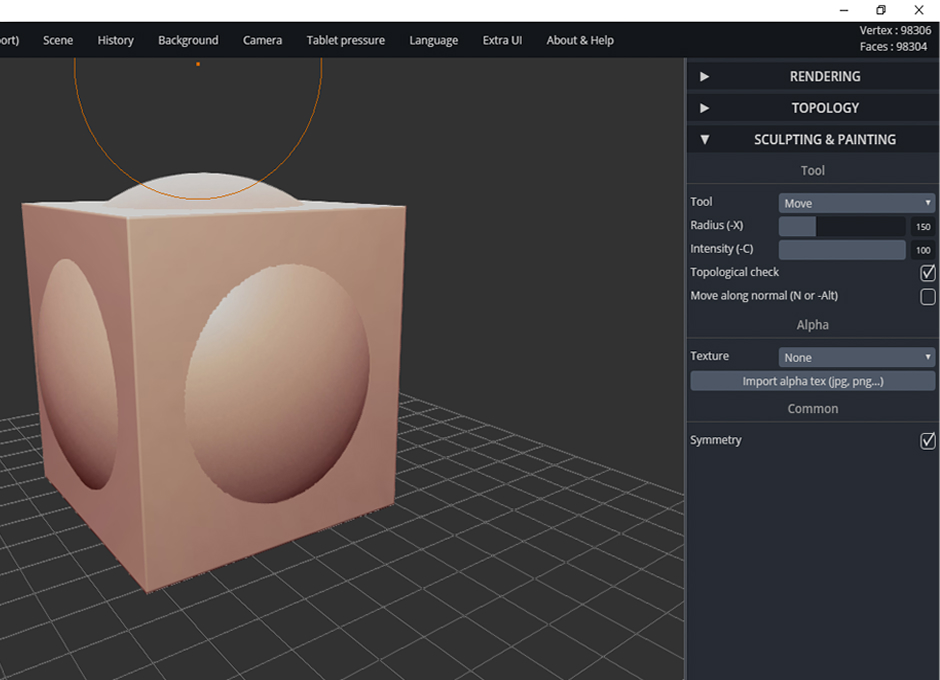
SculptGL is the ultimate software for getting started with 3D sculpting. It is a free 3D sculpting tool designed with beginners in mind. It is a great option for editing STL files for non-professionals. The software is based on WebGL and is pretty minimalistic. Unlike its professional sculpting counterparts like ZBrush, it only comes with a few tools and features for editing and repairing STL files.
Although it has its own flaws, like the occasional production of non-manifolds, SculptGL is the best STI editor for anyone interested in 3D sculpting.
Here is how to edit STL files in SculptGL:
Step 1. Open STL files
Go to Scene then click on Clear scene to delete the default shape.
Load the STL file by selecting File (import, export) > Add (obj, ply, sgl, stl).
Step 2. Edit the STL file
Choose a large tool to define the big features of your mesh. Big features could be arms, limbs and legs. Use smaller brushes for the details.
Go to the Sculpting and Painting toolbar under radius to adjust the tool size. The names of the tools are very straightforward, you would know what to use for different functions.
Activate the symmetry button to save on time. It allows you to sculpt half of the mesh while the other half mirrors your changes.
If your STL file’s surface is degrading or you wish to add smaller details, increase the resolution.
To increase the resolution:
Go to Topology then select Multiresolution then click Subdivide to subdivide the mesh.
Alternatively, remesh by going to Topology, then Voxel Remeshing, then Resolution then Remesh.
Step 3. Save STL
Click File (import/export) then Save STL.
If you are a Windows user this is your prime choice. 3D crafter, also popularly known as 3D canvas is a free 3D editing program specially designed for Windows users. The animation software has a very intuitive interface and simple controls that both beginners and professionals can use. You can import and export a wide range of file formats including STL. Its extensive built-in tools make it an ideal choice for easy STL editing. Its only downside is its inability to export STL in the free version. You are forced to save the file in other formats or get the Pro version.
How to edit STL using 3D crafter:
Step 1. Open the STL file
Go to File, Choose Import, Then STL, then select the object you want to import.
Step 2. Edit the STL files
First off, change the view by pressing the wheel of your mouse and moving it. Alternatively, you can use the orbit button in the toolbar above the model view. You can also make do with the pan and zoom buttons. A mouse would be easier and faster though.
Select a part of or the entire object with the mouse. Right-click on the selected parts or on the rectangle on the lower right corner of the program. You should get a list of options to manipulate and edit your object.
You can access more tools by changing the difficulty level in the upper toolbar from Novice Tools to Intermediate/Pro Tools
If you find it hard to use the program for the first time, go through the short built-in tutorial on the right.
If you own a 3D printer and you are a 3D printing enthusiast, you will soon wonder how to edit an STL file. Pre-downloaded STL files are usually okay but sometimes you will find that they lack some features you need, are damaged or you only want to use parts of them. This is when STL editing comes in. You need the best STL editor for the best results.
We have provided detailed information about various STL editors in this article. We have covered both the free CAD software tools and the mesh editing tools. Mesh editing tools like Meshlab and Meshmixer are excellent STL editors because they are made for modeling and objects represented by 2D surfaces. You don’t have to be a genius to use these programs. Our straightforward step by step guidelines will help you to edit your STL files successfully. You can always check the programs’ websites for more information if you get stuck.