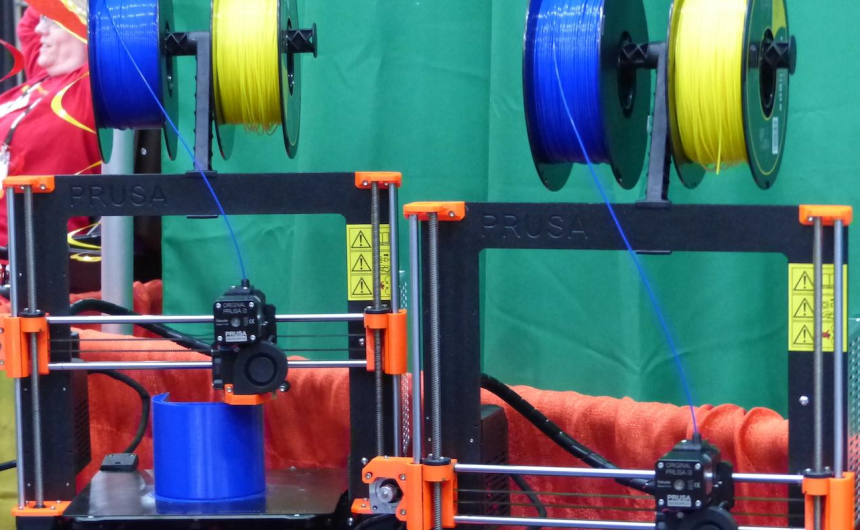
The most common form of 3D printing is FDM which stands for Fused Deposition Modeling. It is also known as Fused Filament Fabrication. What makes this technology popular Trusted Source 3D Printing Is Growing Up: Market Consolidation Picks Up In Additive Manufacturing www.forbes.com is the level of control it grants the user over the choice of filament material as well as modifications of the model to produce their desired print. One of the things you can customize is the 3D printing shell thickness. A shell refers to the perimeter, wall or outline of each layer, and it determines the qualities of the final print.
In this article, we have discussed the various factors you should consider when selecting shell thickness, including the recommended measurements. 3D printing shell thickness is set using slicer software. Shell thickness plays a key role of determining the density and strength of the printed object.
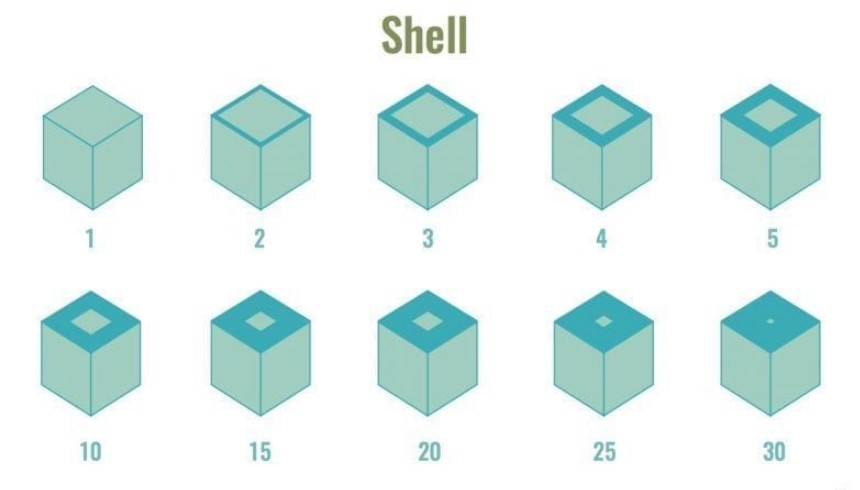 In 3D printing, shell is a collective name for the walls, outlines or perimeters of the object. They include the top and bottom layers which form the exterior of the object.
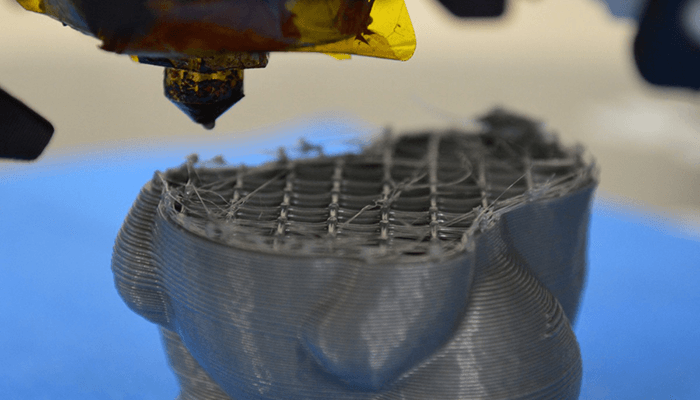
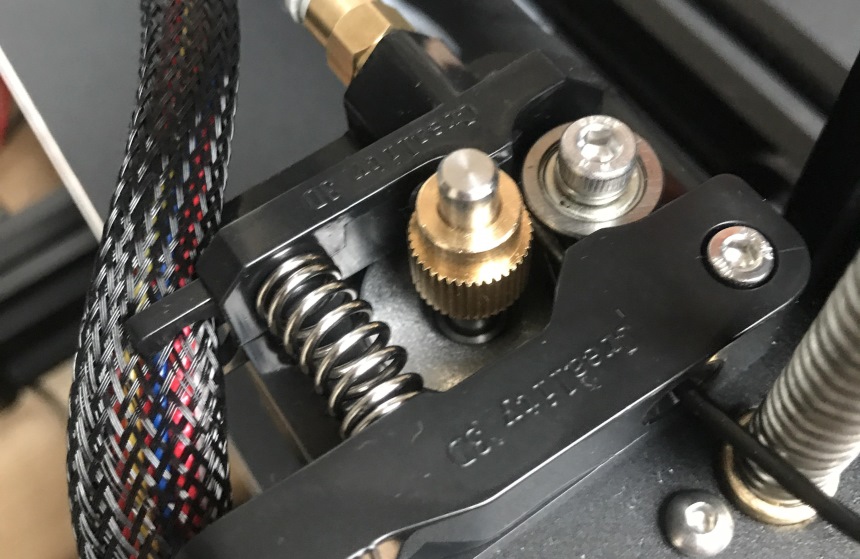
There are many variables that influence the shell thickness, which is typically configured at a multiple of the nozzle diameter. A thicker shell creates a stronger and sturdier product but it uses more filaments and takes longer to print. This is why most mass-produced FDM printed objects feature a hollow interior that saves the time and money used to make them.
Another term you will come across when discussing shell thickness is infill. Infill refers to the pattern of material for the interior. The density of the pattern is known as the infill percentage, and it ranges from 10% to 100%. By using slicer software, you can choose the ideal settings for infill and shell thickness to set the strength and density of the final print.
 Thick shells increase sturdiness in objects such as holders and mounts that require strength to function as designed. But how do shells in 3D printing become thick? Shell thickness combines the number of walls and the width of the shell, expressed in millimeters (mm). A combination of few walls and a high shell thickness is equivalent to a combination of many walls and a low shell thickness.
The shell thickness and the number of shells are the main settings that are used to form walls of a certain thickness.
It is not advisable to increase thickness for designs that must be precise to prevent deforming the shape and structure and making the model unfit for the intended use. Instead, adjust the print to have a thicker shell in weaker and fragile sections to make them less prone to breaking or leaking.
 The recommended shell thickness for objects that require strength and durability is 5 mm, and the absolute minimum thickness is 0.8 mm, according to
Fictiv
Trusted Source
Recommended Wall Thickness for 3D Printing - Fictiv
Guidelines to ensure your 3D print is printable and structurally sound, so you can design prototypes that can be produced in any quantity.
www.fictiv.com
, as a thinner wall would be fragile and prone to damage in transit or during application.
The recommended shell thickness for objects that require strength and durability is 5 mm, and the absolute minimum thickness is 0.8 mm, according to
Fictiv
Trusted Source
Recommended Wall Thickness for 3D Printing - Fictiv
Guidelines to ensure your 3D print is printable and structurally sound, so you can design prototypes that can be produced in any quantity.
www.fictiv.com
, as a thinner wall would be fragile and prone to damage in transit or during application.
A thicker shell might be a disadvantage in models that require precision and intricate designs, especially if some sections of the print are in close proximity to others where they risk overlapping.
A thicker shell may also not be necessary in objects designed to have some flexibility. This is because increasing thickness makes the print rigid and it could create internal stress that causes curling or warping.
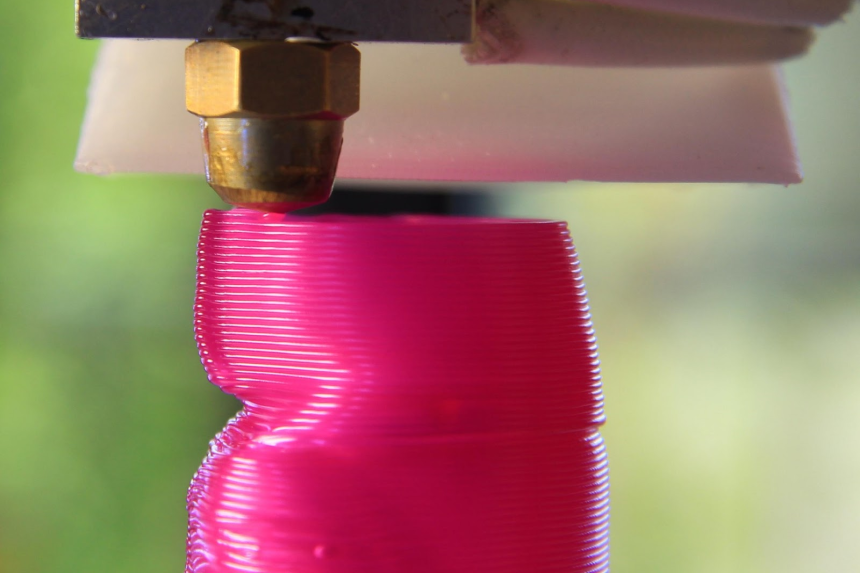
There are downsides to having a shell that is too thin; the melted material require a thick and solid base to hold up when building the object layer by layer. Thin walls are also likely to warp or create cavities in the final print.
Advanced slicers have an integrated feature that prevents users from making the walls too large for the object.
What is the best thickness for shells in 3D printing? It is hard to provide a value because there are several factors that affect thickness. However, you can use these factors to decide on the best settings that will preserve the desired qualities of the final print and shorten the printing time while saving you money on filaments and other costs. Below is a breakdown of what to consider for optimal 3D printing shell thickness.
 FDM printers use filament rolls that can substantially increase printing costs if you are producing several models. This is why you should aim for optimal shell thickness for efficient filament consumption during mass production. A thicker shell creates a strong and dense object, but it will use a lot of filament. If you set the shell thickness to twice the nozzle diameter, the amount of filament consumed will also double. This can be costly because you would make fewer prints from a single filament spool.
It is obvious that thicker shells in 3D printing produce a stronger and sturdier design. This can easily be achieved with the best Creality 3D printers and slicer software with the adjustable settings for shell thickness. Depending on what the product is intended for, you may set the shell thickness to four times the nozzle diameter so the final print can withstand pressure, heavy load, and impact. Products that require thicker shells that will increase their strength include handles, bowls and cups. Other applications that favor a thicker shell are mounts and holders that are anchored with screws or nails. This enables them to bear the regular or sustained load.
Shell thickness will also influence the printing duration. A shell that consumes more filament will also take a longer time to complete because the nozzle must move along the model’s outlines several times for each layer. Making the shell thicker can extend the printing time by an hour, or more. This may not be a big deal if you are printing a one-off model, but it could be problematic when printing plenty of models.
To optimize the printing of high-volume orders, you should adjust the settings for both the shell and infill. This reduces printing time and filament consumption without compromising the quality and strength of the final print.
 Most slicer software provides users with an option that allows them to set different shell thickness for the top and bottom layers to create stable objects. The setting is applicable to models that are printed upright or those that are in the orientation at which the final product will be used. Varying shell thickness allows the designs to have a base that is stronger and heavier than the top for additional stability. There is usually only a slight difference in thickness of the top and bottom layers; about one interval of the nozzle diameter.
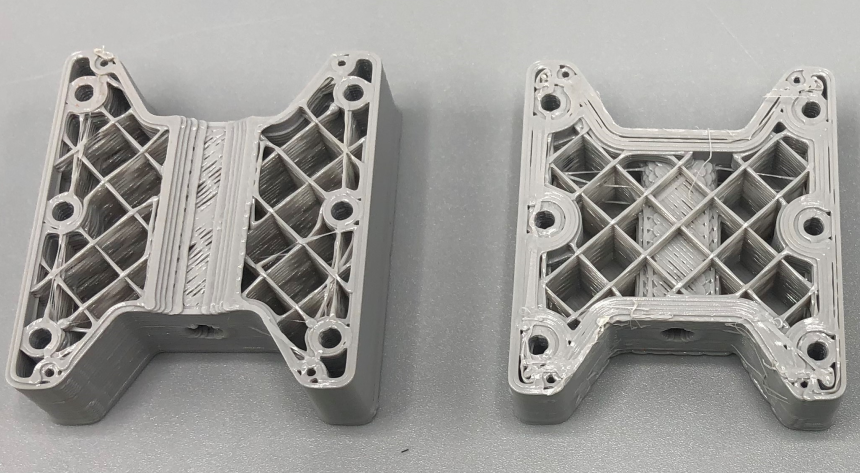
One drawback of using an FDM printer is that the upper layers could compress the lower layers during bonding and create blobs or cause the layers to warp, shrink or misalign. Filament printing also involves a lot of force that often produces prints with irregular surfaces. This is why post-processing is important to smoothen the surface for a polished final print. Since filament is available in different materials, post-processing may be done by using sandpaper, or you may require a solvent for selective dissolution. Either way, the process involves removing the outer layers or eroding the surface of the model to refine or sand it. This necessitates thicker shells in 3D printing that can be smoothened without compromising the structural integrity of the model, particularly those that are designed to be sturdy and strong. For these projects, a thick shell gives you more room to shave off the irregularities during post-processing while preserving the shape of the model and other desired qualities.
We have discussed the factors that determine the right thickness for your models. Using 3D software such as Cura for shell thickness will eliminate guesswork. There are also rules that will guide you on the proper measurements that will complement the object’s purpose.
Slicers allow you to convert and modify files through easy settings. In Cura, shell thickness is configured by using the Custom button to set the thickness of the top and bottom layers as well as the walls to 1.2 mm. Reducing this value will produce a lightweight and flexible product but it will not be stable. Increasing the value will improve the model’s strength and durability, but it might be too rigid and create internal stress that could alter the final design.
There are rules of thumb for setting the thickness of shells when using 3D printers. These are:
A typical nozzle has a diameter opening of 0.4 mm, and shell thickness of 0.8 mm is ideal for most applications that are designed for low or moderate load. These models are not anchored by nails or screws, so they can be made sturdier by increasing their infill percentage.
However, the rule of thumb for load calculation when setting up shell thickness is different for objects designed to withstand heavy loads and impact. For these products, you can increase thickness to up to 1.2 mm to increase strength and durability and enlarge the surface area to accommodate screws or nails when anchoring. If you still need the object to be stronger, we recommend choosing a heavier infill instead of exceeding the 1.2 mm shell thickness.
You can always learn shell thickness you should use with 3D printers for architects for buildings to perform under the stressful conditions it can withstand.
We hope that this resourceful guide has answered all your questions regarding what are shells in 3D printing, how to determine the right thickness and the variables that should influence your decision. We have included the applicable rules for setting Cura shell thickness and how to use load calculation to choose the right settings.
During our research, we also came across 3D printers that are rated highly for their performance and competitive pricing. According to most reviews, ANYCUBIC Photon Mono X is a reliable SLA 3D printer with a spacious working area and the ability to generate high-quality prints with impressive detail even when making small models. Another great recommendation is TRONXY XY-2 PRO TITAN which comes with a standard nozzle size of 0.4 mm and features an adjustable 3D printing shell thickness setting of 0.1 mm to 0.3 mm