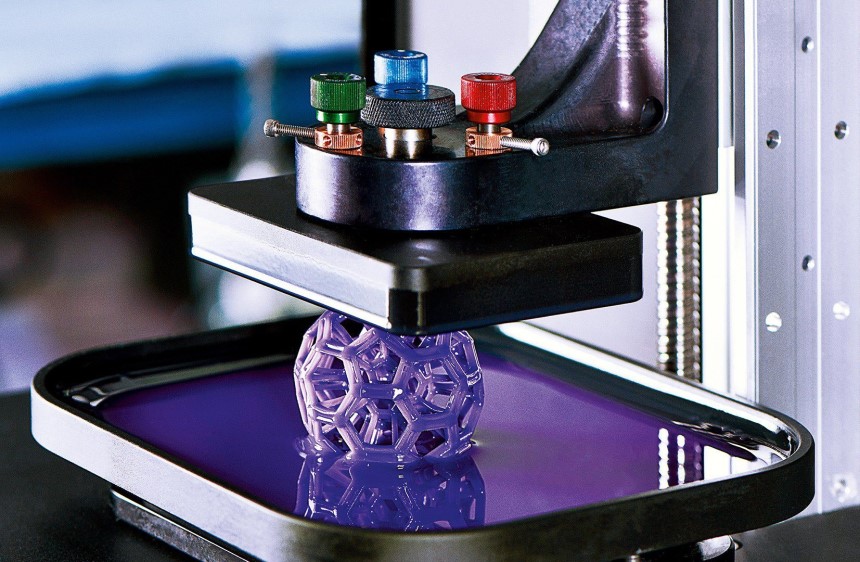
Resin 3D printing is on every 3D printing enthusiast’s lips because of its affordability and how easy it is to use. essentially, resin 3D printing is an additive manufacturing technology that cures liquid photopolymers for individual layers into a solid object. Resin is very sensitive to light, and it solidifies in a very short time.
So how does resin 3D printing work? Well, there are different 3D printing technologies for resin. Nearly everything about them is unique, from the source of light to how the resin is stored and distributed during the printing process. Resin 3D printing mainly involves the storage of the liquid photopolymer in a VAT instead of injecting it through a nozzle like in other methods. This article takes a closer look at resin 3D printing, its different printer technologies, and every other thing it entails.
 Resin 3D printing isn’t any complicated. The process begins with filling the resin tank with resin material either manually or automatically. When filling the tank manually, be sure to avoid skin contact because some resin material may be toxic.
Next, the machine lowers the build platform to create a thin layer of resin that touches the build plate. A source of light draws the pattern of a single layer in the resin, making it solidify. The platform keeps moving to let the uncured resin come through and form a thin layer above the plate. If the printer has a roller, it would move across the building plate to ensure the resin lies perfectly.
The process repeats itself until the entire object is formed. Once it is done, the object is removed from the printer for post-processing.
If you are looking to get a resin 3Dprinter and have no idea where to look, check out the popular ELEGOO Saturn mSLA 3D printer. It is a top choice for many because it offers quality prints and consistent success. You will love its faster-printing speed and higher precision.
There is a wide range of resins on the market that covers all the applications and needs of 3D printing. Every photopolymer resin has working components needed for the reaction and additives like dyes and functional supplements.
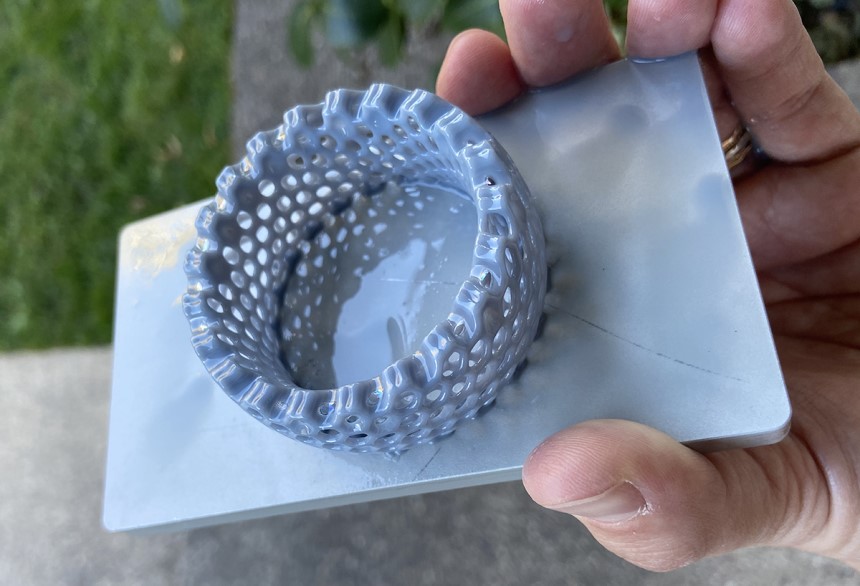
Although you may still get layer lines in resin printing, they will be very tiny and nearly invisible on some colors of resin.
Since photopolymers are loaded into a printer as liquid, they are easier to shape into sophisticated geometries than melted plastics.
 Fast Printing Speed
Resin printing is a tad faster than other prototyping methods, especially with the modern machines.
Resin printing is cost-effective for certain applications like prototypes, dental devices, and models for jewelry.
Unlike powder materials and plastics, photopolymers come out solid and waterproof. They barely absorb moisture from the air and can be used for water-tight applications.
As mentioned before, resin 3D printing has different technologies, and they include:
Contrary to popular opinion, SLA was the very first 3D printing technology. FDM is mistaken to be the pioneer, but it is SLA. It was first patented 40 years ago and is highly regarded as a very accurate 3D printing technology.
SLA uses both resin and laser, hence its high level of accuracy. An SLA printer features a vat that works like a resin tank, a building platform, a source of light, a pair of galvanometers, and an elevator. The build platform, located above the vat, is used to raise and lower the building platform during the printing process.
Most SLA printers use a solid-state laser as a source of light. The resin gets cured the moment the laser beam hits the vat, which is directed by the galvanometers. After one layer is cured by the laser, the build platform is raised at exactly the height of one layer. The process repeats itself until the 3D printed object is complete.
There are 2 types of SLA 3D printers: inverted printers and top-down printers. Their main differences are the location of the source of light and the building platform’s direction of movement. Inverted SLA printers are the most popular. Their light source is located under the vat.
When you watch a video in fast-motion on an operating inverted SLA 3D printer, you will get the impression that the printed object is getting pulled out of the resin tank.
As for the top-down SLA 3D printers, the light source location is above the resin tank and the building platform. This means that whenever you start 3D printing on the top-down printer, there’s only one layer of resin on the building platform. Once this layer is cured by the light, the building platform moves into the tank. The last part gets fully immersed in the resin.
The pros of a 3D resin printer that uses UV laser include:
The cons are:
This is very similar to the SLA technology. The only difference is that it uses a digital projection surface as a source of light instead of laser. Also, unlike in SLA, where the laser cures only a single dot at a time, the screen of a DLP printer projects the image of one layer in one go. this is why DLP printers are quicker at printing compared to SLA printers.
With DLP 3D printers, come digital micromirror devices (DMD) that control the direction of light. The device contains up to millions of tiny micromirrors that direct the light to create a pattern in the layer. This process solidifies the whole layer once. The DMD, is in fact, the most crucial component in every DLP chipset.
A layer’s image basically constitutes pixels. Any layer created by DLP starts from a digital screen. Further, if the layer is created on its image, it consists of voxel which are tiny rectangular prisms that you can see on all three axes. After one layer has been completely created, the building plate moves on at the appropriate height to project a new image of a new layer. The process is repeated until the 3D printed part grows.
DLP’s pros include:
The cons:
It’s easy to differentiate SLA from DLP but it is not easy to distinguish DLP from LCD. LCD is also popularly known as mSLA.
While DLP uses a micromirror device to direct light from the projector to the bottom of the resin tank, LCD gets its light directly from multiple LEDs shining through an LCD screen. The screen acts as a mask, hence the name maskedSLA and the specific pixels for the selected layer are the only ones displayed.
The LCD technology is what made 3D resin printing popular because the individual components of 3D resin printing with LCD are more accessible and affordable. On the flip side, LCD has a shorter lifespan compared to other technologies like DLP and it requires more maintenance.
The advantages of LCD technology are;
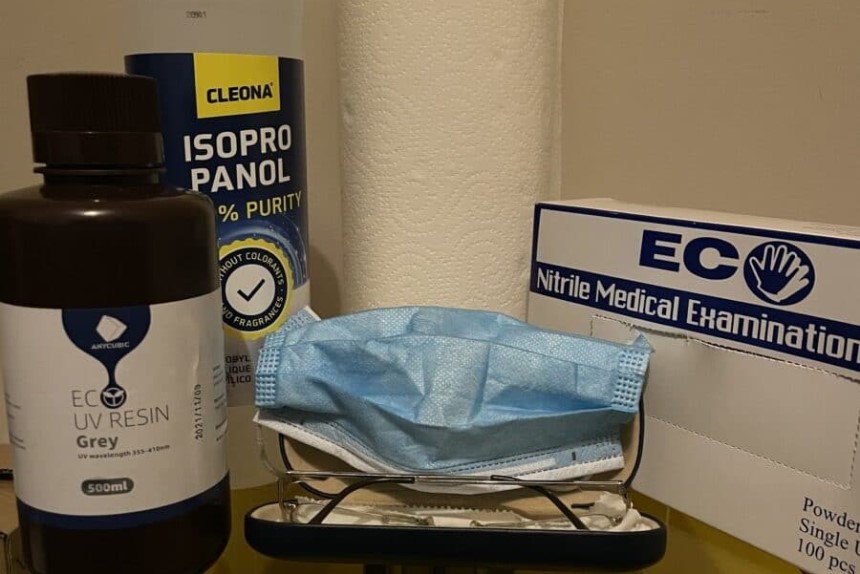
Post-processing is essential. It helps you get the optimal properties out of your prints. The end product will have all the desired characteristics without feeling too sticky. Before post-processing, be sure to gear up for safety purposes. Get a pair of gloves, preferably the nitrile or neoprene kind to protect your hands. Also get a pair of glasses and protective clothing. If resin contacts your skin, wash with plenty of water and soap.
Here is a step by step guide on post-processing resin 3D prints:
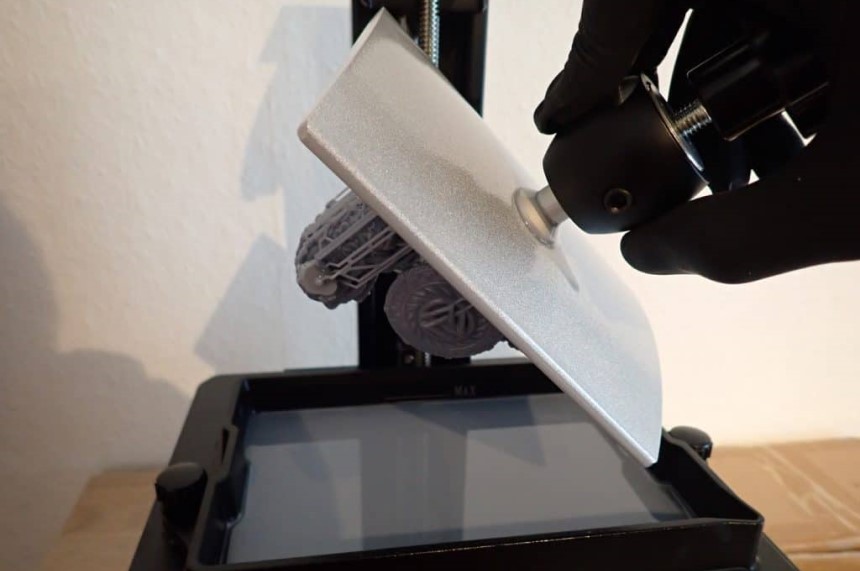
Once the object is printed, you need to remove it together with the uncured and unclean parts. Use a blade or any other sharp tool to remove the object from the build plate. Unlike FDM printing, this process requires extra attention to avoid causing damage to the printer’s building platform.
After putting on your nitrile or neoprene gloves, lay down paper towels to catch any drips. Do not use water or any cleaner to remove resin from the build platform, instead, use IPA or Ethanol for better cleaning results.
 Step 2. Clean the Object
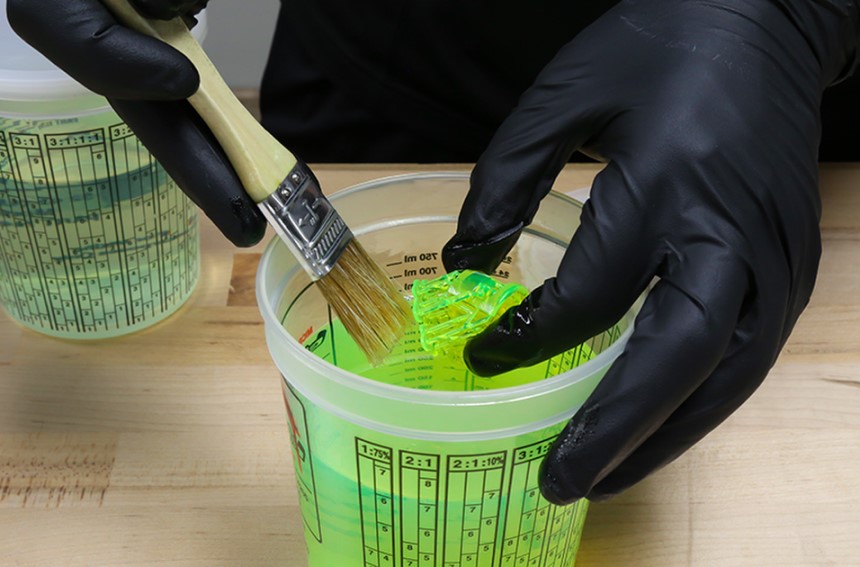
Cleaning is a crucial step in bringing out the optimum properties of the final print. Plus, if the print is not cleaned, the resin on the surface can distort its shape. Also, cleaning gets rid of sticky cured drips.
For proper cleaning, rinse the object in ethanol, IPA, or Liqcreate resin cleaner for about 4 to 5 minutes. If you used Liqcreate resins, use 2 cleaning containers; one for removing the most of the resin and the other for performing optimal cleaning of the green parts. Ensure there is enough cleaning solution to completely submerge the object or at least change its position easily.
When cleaning, keep in mind that green parts can crack when exposed to cleaning solvents for more than 20 minutes. When you are done cleaning, let the object dry for post-curing. You cancan do this by placing it in a well-ventilated area for about 30 minutes or subjecting it to pressurized air for only 2 minutes.
Pro tip: Be sure to check the cleaning containers for contamination before you begin the cleaning process. A contaminated container can cause surface defects. Also, you may end up with a sticky object after all the efforts.
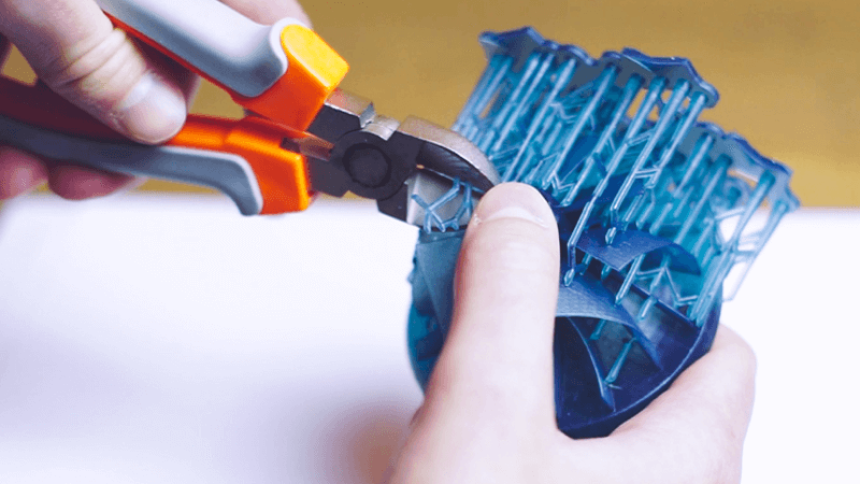
 Step 3. Remove the Supports
At this point, the object shouldnt be any sticky. Use a model cutter to remove the supports. Move closer to the tips for an easier time because the supports are pointed. Be careful not to cut the supports off too close to the model as this may remove portions of the model, causing surface pitting.
You can get rid of any remains left behind by the supports by sanding or polishing. You can only sand or polish after post-curing because the surface won’t be hardened enough.
Some industry experts Trusted Source How to Effectively Remove Supports from a Resin 3D print In this article I will share the best and easiest method I have found for removing supports that requires the least amount of post processing. 3dprintknowledge.com even recommend removing the supports after post-curing. It does make sense because at this point the object is clean and no gloves are needed to touch it. Most people prefer to remove the supports pre-curing to avoid damaging the object. Post-curing makes the supports very hard to remove and bits of them may be left on the object.
 Step 4. Post-Cure
This is the final step in post-processing. It involves curing the object in a high-power UV curing box for about 15 minutes at 65 degrees Celsius. Here is more on how long you should cure your resin prints. The most recommended wavelength of the curing unit should be between 300 and 420 nanometers. The curing range of a standard 3D printer for Liqcreate photopolymer resins is anything between 385 and 420 nanometers. If you use a low-power UV curing unit, you will take longer and you may end up with inferior part properties.
Another thing you must be extra keen on is the dryness of the object before curing. Curing wet and sticky parts can cause surface defects. The object may have a constant sticky surface. Just counter check that the object is dry before you cure it in the UV curing box, even when you only wash it with water.
When you are done post-curing, you can do a few more things to improve the aesthetics of the object. You can sand, polish, prime or paint. This is entirely optional because either of these processes affect the tolerances and details of the object dramatically. You also have to consider the type of material you are working on before applying any post-curing steps. Some steps like sanding and polishing have better results on harder materials than soft materials.
Resins are naturally occurring substances, but thanks to advancement in technology, they can be made synthetically. Some synthetic resins have similarities with plant resins, but most of them are very different.
There are 12 different types of resins with different properties and applications. They include; phenolic resins, alkyd resins, polyester resins, polyamide resins, polyurethane resins, PO;ycarbonate resins, polystyrene, acrylic, epoxy, polyethylene, and polypropylene resins. These are only the most commonly used resins. There are other types missing on the list. They all have different applications, for instance, polyurethane, epoxy, silicone, and polyester are commonly used in jewelry making.
The ANYCUBIC 3D Printer Resin remains the most acclaimed resin out there because it offers strong adhesion, great stability, and appropriate toughness. You will also enjoy rapid prototyping with it as it is designed to reduce the forming time.
 Proper storage will increase your resin’s lifespan. Here’s how to go about it:
The original containers in which resins come cannot react and degrade the material.
When resin gets mixed up, you get a hard block that you have to either use or lose.
Avoid storing the resin in direct sunlight because the UV can degrade the product.
Store in an area with steady temperature like your garage, freezer or in the attic.
Mark the purchase date on the resin’s container so that you can use them in a timely manner.
Store the resin bottles in a plastic bag or a larger plastic container to be able to contain a mess easily in case one occurs.
 When resin expires or becomes too contaminated to be filtered, you have to dispose of it. Now, resin can cause irritation or allergic reaction to your skin. You have to wear protective gear before disposing it. Here is how to do the disposal properly:
The cost of resin 3D printers vary depending on the technology and brand. A resin 3D printer can cost anything from 500 dollars to over 250,000 dollars. LCD resin printers are much cheaper than their DLA and SLA counterparts. So many models fall below the 10000 dollar price range.
So many 3D printing enthusiasts are gaining interest in Resin 3D printing because it compares favorably to FDM printing. How does resin 3D printing work? Resin 3D printers use the principle of photopolymerization to create objects. They operate according to a code. The printing machine literally creates a code right from an uploaded digital model. Photopolymers, also know as UV or daylight resins, are the materials used, and they are stored in vat or resin tanks.
Resin prints require post-processing for thethe best results. You need to wash, remove supports, and cure your resin prints. You can improve your prints’ aesthetics further by painting, sanding, polishing, and patching holes. The post-processing activities can be done either manually or with special tools and machines. There are machines for washing, curing and sanding.